
Author Archive

The Truth About Lead Paint in Older Maryland Homes: What Your Contractor Should Be Doing

June 2nd, 2026 | Home Renovations

Many of Maryland’s most charming homes were built long before modern safety standards existed. From historic rowhouses in Baltimore to Colonial and Craftsman-style homes throughout Montgomery County, Prince George’s County, and surrounding communities, older properties offer character that newer construction often cannot replicate. Yet behind beautifully detailed trim, original wood windows, and vintage plaster walls, there may be a hidden concern that homeowners should never overlook: lead-based paint.

At Exquisitely Renovated LLC, we regularly work on homes built decades before lead paint was banned for residential use. During kitchen renovations, bathroom remodels, interior painting projects, and whole-home renovations, identifying and managing lead hazards is an essential part of protecting homeowners, families, and workers. Lead paint is not something to fear when handled properly, but it is something every homeowner should understand before beginning a remodeling project.

Many property owners assume that lead paint is only dangerous if it is visibly peeling or deteriorating. The reality is more complicated. Renovation activities themselves can create significant risks when proper precautions are not taken. Understanding what your contractor should be doing before, during, and after construction can help ensure your project remains safe, compliant, and professionally managed.

Understanding Lead Paint in Maryland Homes

Lead-based paint was widely used in residential construction throughout the United States for much of the twentieth century. Its durability, moisture resistance, and ability to maintain vibrant color made it a popular choice among builders and painters.

In 1978, the federal government prohibited the use of lead-based paint in residential properties. Any home built before that year may contain lead paint on interior walls, exterior siding, trim, windows, doors, railings, porches, or other painted surfaces.

Many Maryland communities contain housing stock that predates the ban by several decades. Homes constructed in the early and mid-1900s are especially likely to contain multiple layers of lead-based paint beneath newer coatings. Even properties that have been repainted numerous times can still contain lead beneath the visible surface.

Lead paint is not always an immediate hazard when it remains intact and undisturbed. Problems arise when painted surfaces begin to deteriorate or when renovation activities create lead-contaminated dust and debris. Sanding, demolition, scraping, cutting, drilling, and window replacement can all release microscopic lead particles into the air and surrounding environment.

These particles can settle on floors, furniture, HVAC systems, toys, and household surfaces, creating potential exposure risks long after the renovation work is complete.

Why Lead Exposure Is a Serious Concern

Lead is a toxic metal that can affect nearly every system in the human body. Exposure occurs primarily through inhalation of lead dust or ingestion of contaminated particles.

Young children are particularly vulnerable because their developing brains and nervous systems absorb lead more readily than adults. Even relatively low levels of exposure can contribute to developmental delays, learning difficulties, behavioral problems, and reduced cognitive function.

Adults are not immune to lead-related health issues. Exposure may contribute to elevated blood pressure, kidney damage, reproductive complications, neurological effects, and other health concerns.

Pregnant women face additional risks because lead exposure can affect fetal development. For this reason, renovation projects in occupied homes require careful planning and strict containment procedures.

The danger is often not the visible paint itself but the invisible dust generated during construction activities. A contractor who treats lead safety as an afterthought may unintentionally create hazardous conditions throughout the home.

Maryland Regulations and Federal Requirements

Maryland has some of the nation’s most established lead-related regulations due to the age of much of its housing inventory. Property owners and contractors must comply with various state and federal requirements designed to reduce lead exposure risks.

One of the most important federal rules is the Environmental Protection Agency’s Renovation, Repair and Painting (RRP) Rule. This regulation applies to contractors working in homes, child care facilities, and schools built before 1978.

Under the EPA’s RRP Rule, contractors performing qualifying renovation work must be certified and trained in lead-safe work practices. The rule establishes specific procedures for containment, cleanup, documentation, and occupant protection.

Homeowners should understand that certification is not simply a credential to display on a website. It represents training on how to safely manage lead hazards during construction activities.

Any contractor working on a pre-1978 home should be familiar with these requirements and capable of explaining how they will protect the property during the renovation process.

What Your Contractor Should Do Before Renovation Begins

Professional lead management starts long before demolition crews arrive.

A responsible contractor begins by evaluating the age of the property and determining whether lead-containing materials may be present. Since homes built before 1978 carry a higher likelihood of containing lead paint, this assessment should occur during project planning rather than after work has already started.

What Your Contractor Should Do Before Renovation Begins

Depending on the scope of work, contractors may recommend lead testing or risk assessment services. Testing can identify lead-containing surfaces that may be affected during the renovation. Knowing where lead exists allows the project team to develop appropriate containment and removal strategies.

Homeowners should also receive information regarding potential lead hazards and the precautions that will be implemented throughout the project. Open communication helps establish realistic expectations while ensuring everyone understands the safety measures being employed.

Pre-construction planning should address occupancy considerations as well. In some situations, temporary relocation of residents may be advisable, particularly when extensive demolition or large-scale disturbance of painted surfaces is anticipated.

Proper Containment Is Non-Negotiable

Containment is one of the most important components of lead-safe renovation.

Without proper barriers, lead-contaminated dust can migrate throughout the home and remain in living spaces long after construction concludes. Effective containment minimizes this risk by isolating the work area from occupied portions of the property.

Professional containment often includes sealing doorways, vents, registers, and openings with specialized plastic sheeting. Floors and surfaces within the work zone should be protected using durable containment materials capable of capturing dust and debris.

Negative air systems may be used during larger projects to prevent airborne particles from escaping the renovation area. Workers should maintain controlled entry and exit procedures that reduce contamination outside the containment zone.

Containment is not merely about protecting visible finishes. It is designed to prevent microscopic particles from spreading into kitchens, bedrooms, play areas, and HVAC systems.

If a contractor begins sanding, demolition, or paint removal without establishing containment, that should raise immediate concerns.

Lead-Safe Work Practices During Construction

The methods used during renovation significantly influence the amount of lead dust generated.

Lead-safe contractors avoid practices known to create excessive airborne contamination. Dry sanding, open-flame burning, uncontrolled demolition, and aggressive grinding can release substantial quantities of lead particles into the environment.

Instead, trained professionals utilize techniques intended to reduce dust generation. Wet methods, specialized tools equipped with HEPA filtration systems, and carefully controlled removal procedures help minimize airborne contamination.

Workers should wear appropriate personal protective equipment and follow decontamination procedures before leaving the work area. Tools and equipment should remain within designated containment zones whenever possible.

Daily housekeeping is another essential component of lead-safe renovation. Dust and debris should be continuously managed rather than allowed to accumulate throughout the project.

A clean jobsite is often a sign of disciplined safety practices and professional project management.

The Critical Importance of HEPA Vacuums and Specialized Cleanup

One of the most misunderstood aspects of lead-safe renovation is cleanup.

Standard household vacuums are not designed to capture microscopic lead particles. In many cases, using an ordinary vacuum can actually redistribute contaminants into the air.

Professional contractors utilize High-Efficiency Particulate Air (HEPA) vacuum systems capable of capturing extremely small particles. These specialized vacuums play an important role during active construction and final cleanup.

After renovation activities conclude, surfaces should be thoroughly vacuumed, wiped, and cleaned according to established lead-safe protocols. Floors, windowsills, trim surfaces, and horizontal areas where dust may accumulate require careful attention.

Cleanup is not complete simply because debris has been removed. The objective is to eliminate residual contamination that may remain after construction activities end.

Verification and Final Safety Checks

A reputable contractor should never assume the work area is clean without verification.

Final cleaning procedures should be followed by visual inspections and, when appropriate, additional testing or clearance evaluations. These steps help confirm that dust and debris have been effectively removed before occupants fully reenter the renovated space.

Documentation is another hallmark of professional lead-safe renovation. Contractors should maintain records of training, certifications, work practices, and project procedures when required.

Homeowners should feel comfortable asking questions about containment methods, cleanup procedures, and compliance measures. Contractors who prioritize safety generally welcome these conversations and provide clear explanations of their approach.

Warning Signs of an Unqualified Contractor

Unfortunately, not every contractor follows proper lead-safe procedures.

Warning signs may include a lack of EPA certification, unwillingness to discuss lead-related precautions, absence of containment barriers, visible dust migration throughout the home, or the use of prohibited work practices.

Warning Signs of an Unqualified Contractor

Extremely low project bids can sometimes indicate corners being cut on safety measures. Lead-safe renovation requires additional labor, materials, training, and planning. Those investments contribute to a safer project and better long-term outcomes for homeowners.

Selecting a qualified renovation partner is not simply about craftsmanship. It is also about risk management, regulatory compliance, and protecting the health of everyone who occupies the property.

Protecting Maryland Homes Through Responsible Renovation

Lead paint remains a reality in many older Maryland homes, but it does not have to prevent homeowners from updating and improving their properties. The key lies in working with professionals who understand the responsibilities associated with renovating pre-1978 homes.

At Exquisitely Renovated LLC, we believe quality construction and safety go hand in hand. Every renovation project should be approached with careful planning, appropriate containment, disciplined work practices, and meticulous cleanup procedures. These measures protect the integrity of the home while safeguarding the people who live there.

When evaluating contractors for your next remodeling project, ask detailed questions about lead-safe practices. A qualified professional should be able to explain their process with confidence and clarity. That conversation can make all the difference between a renovation that simply looks beautiful and one that is completed responsibly, safely, and with lasting peace of mind.

Learn more about how to get started:
A Homeowner’s Guide to D.C. Building Permits: What You Can (and Can’t) Do Yourself

June 2nd, 2026 | Home Renovations

Home improvement projects are exciting. A new kitchen, a finished basement, an expanded living area, or a beautifully updated bathroom can dramatically improve the comfort, functionality, and value of your home. Before any demolition begins or new materials arrive, there is one critical step every Washington, D.C. homeowner needs to understand: building permits.

At Exquisitely Renovated LLC, we regularly help homeowners navigate renovation projects throughout Washington, D.C. One of the most common sources of confusion is determining which projects require permits and which tasks homeowners can legally perform on their own. Permit requirements can seem complicated at first glance, but understanding the basics can save you significant time, money, and frustration.

Many homeowners are surprised to learn that even seemingly straightforward projects may require approval from the District. Others assume they can complete certain work themselves, only to discover later that licensed professionals and permits were required from the start. Knowing the rules before work begins helps protect your investment and ensures your renovation meets local safety standards.

Why Building Permits Matter in Washington, D.C.

Building permits are designed to protect homeowners, neighbors, future buyers, and the community as a whole. They ensure construction work complies with local building codes, zoning regulations, fire safety requirements, and structural standards.

When a permit is issued, the project becomes subject to inspections at various stages of construction. These inspections verify that the work is being performed correctly and safely. Without proper permits and inspections, serious issues can remain hidden behind walls, ceilings, and floors.

Unpermitted work can also create complications when selling a home. Buyers often request documentation showing that renovations were completed legally. Missing permits may delay transactions, reduce property value, or require corrective work before closing.

Insurance claims can present additional challenges. If damage occurs due to unpermitted construction, insurance providers may scrutinize the claim more closely. In some situations, coverage disputes can arise if renovations were not completed according to local regulations.

For these reasons, obtaining the proper permits should never be viewed as a bureaucratic obstacle. It is an important safeguard that protects your home and your financial investment.

Understanding the Role of the D.C. Department of Buildings

Building permits in Washington, D.C. are generally administered through the District’s Department of Buildings (DOB). The agency reviews permit applications, enforces building codes, conducts inspections, and oversees construction activity throughout the city.

Depending on the scope of work, your project may require reviews from multiple departments. Structural modifications, electrical upgrades, plumbing changes, mechanical systems, zoning compliance, historic district regulations, and environmental considerations may all influence permit requirements.

The complexity of the review process often depends on the nature of the project. Replacing existing finishes usually involves fewer regulatory requirements than altering structural elements, expanding living space, or modifying building systems.

This is one reason many homeowners choose to work with experienced renovation professionals. Contractors familiar with local regulations can identify permit requirements early in the planning process and help avoid costly delays later.

Projects Homeowners Can Typically Do Without a Permit

Not every home improvement project requires government approval. Many cosmetic upgrades and maintenance tasks can be completed without obtaining a building permit.

Painting interior walls is one of the most common examples. Changing colors, refinishing surfaces, or updating decorative finishes generally does not trigger permit requirements. Installing new flooring materials, replacing carpeting, refinishing hardwood floors, and updating trim are also commonly exempt.

Kitchen improvements can sometimes proceed without permits when no plumbing, electrical, or structural modifications are involved. Replacing cabinet doors, installing new countertops, changing backsplashes, and updating hardware typically fall into this category.

Bathroom refreshes often qualify as non-permitted work when fixtures remain in their original locations and no underlying plumbing systems are altered. Replacing mirrors, vanities, faucets, tile finishes, or accessories is frequently considered cosmetic maintenance.

Exterior maintenance projects may also proceed without permits in many cases. Painting siding, replacing gutters with similar materials, repairing existing fences, and performing minor landscaping improvements are often exempt from permitting requirements.

That said, homeowners should never assume a project is exempt simply because it appears minor. Local regulations can change, and individual circumstances may affect permit obligations. Confirming requirements before starting work remains the safest approach.

When a Building Permit Is Usually Required

Permit requirements become much more likely whenever construction affects a home’s structure, building systems, safety components, or occupancy characteristics.

Removing or altering walls is a common example. Even if a wall appears non-structural, permit reviews may be necessary to verify that no structural elements, utilities, or life-safety systems are affected. Structural modifications almost always require permits and inspections.

Additions and expansions also require permits. Creating new square footage, building sunrooms, adding second-story spaces, constructing decks, or expanding existing rooms involves extensive code compliance reviews.

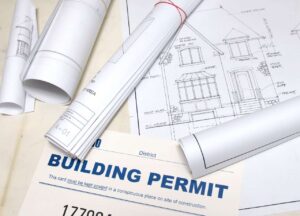
building permits

Basement finishing projects frequently require permits as well. Electrical wiring, framing, insulation, emergency egress requirements, smoke detection systems, and mechanical upgrades often trigger permit obligations.

Roof replacements may require permits depending on the scope of work and materials involved. Significant alterations to roofing systems typically undergo review to ensure compliance with current building standards.

Window and door replacements can sometimes require permits, particularly when opening sizes change or structural modifications are necessary. Exterior changes may also be subject to historic preservation requirements in designated districts.

Major kitchen and bathroom remodels often require permits because plumbing, electrical, and mechanical systems are commonly modified during construction. Moving sinks, relocating appliances, adding circuits, or changing ventilation systems usually requires review and inspection.

What Electrical Work Can Homeowners Perform?

Electrical work is among the most heavily regulated aspects of residential construction due to the obvious safety risks involved.

Many homeowners assume they can handle electrical upgrades themselves because the work appears relatively simple. In reality, permit requirements and licensing restrictions often apply to electrical projects.

Replacing light fixtures, outlet covers, switches, and similar components may be permissible under certain circumstances. More substantial work, however, often requires permits and inspections.

Installing new circuits, upgrading service panels, rewiring rooms, adding electrical capacity, and modifying branch circuits typically fall into regulated categories. Improper electrical work can create fire hazards, shock risks, and code violations that remain hidden for years.

Even experienced DIY enthusiasts should exercise caution when considering electrical projects. Safety considerations extend beyond technical installation practices and include code requirements that are regularly updated.

Consulting local regulations before beginning electrical work is always advisable.

What Plumbing Work Can Homeowners Perform?

Plumbing regulations are similarly important because improper installations can lead to water damage, mold growth, sanitation concerns, and expensive repairs.

Minor fixture replacements may be completed without permits when no plumbing lines are altered. Replacing faucets, showerheads, and similar fixtures generally falls into this category.

Once supply lines, drain lines, venting systems, or fixture locations are modified, permit requirements often come into play. Moving sinks, relocating toilets, installing new showers, adding bathrooms, and modifying water supply infrastructure typically require approvals and inspections.

Water heaters frequently present questions for homeowners. Replacement requirements vary depending on equipment type, installation conditions, venting systems, and local regulations. Many water heater projects require permits even when replacing an existing unit.

Understanding these distinctions before work begins helps prevent compliance issues later.

The Special Considerations of Historic Districts

Washington, D.C. contains numerous historic districts and designated historic properties. Homeowners in these areas face additional review requirements beyond standard building permits.

Exterior modifications are often subject to preservation guidelines intended to maintain architectural character. Changes involving windows, doors, roofing materials, porches, additions, fences, and visible exterior features may require review by preservation authorities.

The Special Considerations of Historic Districts

Historic review does not necessarily prevent renovation work. Many upgrades are approved every year. The process simply involves ensuring proposed changes respect the property’s historic significance.

Homeowners should determine early in the planning process whether their property falls within a protected district. This knowledge can significantly affect project schedules and approval timelines.

The Risks of Skipping Permits

Attempting to avoid permits may appear to save money initially, but the long-term consequences can be substantial.

Municipal inspectors may issue stop-work orders when unpermitted construction is discovered. Work can be halted until permits are obtained and compliance issues are addressed. This frequently leads to project delays and additional expenses.

Corrective measures may include opening finished walls, exposing concealed systems, and reconstructing portions of completed work to allow inspection. These requirements often cost far more than obtaining permits in the first place.

Financial penalties may also apply. Depending on the circumstances, homeowners can face fines, permit surcharges, and enforcement actions.

Future property sales can become complicated as well. Buyers, lenders, appraisers, and title companies increasingly scrutinize renovation records. Missing permits can create obstacles that affect negotiations and closing timelines.

The short-term convenience of bypassing permits rarely outweighs the potential risks.

How Homeowners Can Make the Permit Process Easier

The permit process becomes far less stressful when approached proactively. Planning early gives homeowners time to identify requirements, gather documentation, and address potential concerns before construction begins.

Accurate project plans are essential. Detailed drawings, scope descriptions, and specifications help reviewers understand the proposed work and reduce the likelihood of delays caused by incomplete submissions.

Maintaining open communication with contractors is equally important. Experienced renovation professionals understand local permitting procedures and can help coordinate applications, inspections, and compliance requirements throughout the project.

Patience also plays a role. Permit reviews and inspections require time, particularly for larger renovations involving multiple disciplines. Building realistic timelines into the project schedule helps minimize frustration.

Final Thoughts

Building permits are a fundamental part of responsible homeownership in Washington, D.C. Understanding what you can do yourself and where professional oversight becomes necessary helps protect your property, your safety, and your investment.

Cosmetic updates often provide flexibility for homeowners who enjoy tackling projects independently. Structural changes, electrical upgrades, plumbing modifications, additions, and major renovations generally require permits and inspections to ensure compliance with local codes.

Every project is unique, and permit requirements can vary based on location, scope, property type, and historic district considerations. Taking the time to verify requirements before construction begins can prevent costly setbacks and ensure your renovation progresses smoothly from concept to completion.

For homeowners planning significant remodeling work, understanding permit obligations from the outset creates a stronger foundation for a successful project and delivers confidence that the finished result meets the standards expected throughout the District.

Learn more about how to get started:

Bathroom Tile Ideas That Elevate Everyday Living

April 17th, 2026 | Bathroom Remodeling

A well-designed bathroom does more than serve a practical purpose. It sets the tone for how you begin and end each day. Tile plays a central role in that experience, shaping not only the look of the space but also its durability and comfort. At Exquisitely Renovated, we approach tile selection as a design foundation rather than an afterthought. The right combination of material, pattern, and finish brings harmony to the room and ensures it performs beautifully for years to come.

Many homeowners come to us seeking a refined bathroom upgrade, unsure how to translate inspiration into a cohesive result. Our bathroom renovation services often begin with tile consultations, where we guide clients through options that align with their lifestyle, aesthetic goals, and maintenance preferences. From understated elegance to bold artistic statements, tile opens the door to remarkable possibilities.

The Power of Tile in Bathroom Design

Tile has long been favored for bathrooms due to its resilience in moisture-rich environments, yet its appeal extends far beyond practicality. It introduces texture, color, and structure in ways paint and fixtures alone cannot achieve. The scale of the tile, the direction of installation, and the interplay of finishes all contribute to the final atmosphere of the space.

A thoughtfully selected tile can make a compact bathroom feel expansive or add intimacy to a larger layout. Glossy finishes reflect light and brighten darker rooms, while matte surfaces create a softer, more grounded presence. Even subtle variations in grout color can shift the visual impact, either blending seamlessly or highlighting the geometry of the design.

Timeless Ceramic and Porcelain Choices

Ceramic and porcelain tiles remain among the most versatile and reliable options for bathroom surfaces. Their wide range of styles allows them to adapt to nearly any design vision, from classic to contemporary. Porcelain, in particular, offers superior density and water resistance, making it ideal for floors and high-use areas.

In many of our renovation projects, we see clients gravitate toward large-format porcelain tiles that mimic natural stone. These designs provide the elegance of marble or limestone without the maintenance concerns. Fewer grout lines create a cleaner, more expansive look, which is especially valuable in smaller bathrooms where visual clutter can feel overwhelming.

Ceramic tiles, often used for walls and backsplashes, bring flexibility in color and pattern. Soft neutrals create a calming retreat, while deep hues like navy or forest green add depth and sophistication. When paired with the right lighting and fixtures, even a simple ceramic tile can feel elevated and intentional.

Natural Stone for Elevated Luxury

Natural stone carries a distinct presence that is difficult to replicate. Materials like marble, travertine, and slate introduce organic variation, ensuring no two surfaces are identical. This uniqueness brings warmth and authenticity to the bathroom, making it feel curated rather than manufactured.

Natural Stone for Elevated Luxury

Marble remains a favorite for those seeking a refined, timeless aesthetic. Its veining adds movement and visual interest, particularly when used across large surfaces such as shower walls or flooring. Proper sealing and maintenance are essential, and our team ensures every installation is handled with precision to protect the material over time.

Travertine offers a softer, earth-toned palette that suits more relaxed and inviting spaces. Its subtle texture works beautifully in spa-inspired bathrooms, especially when paired with warm lighting and natural wood elements. Slate, with its darker tones and layered texture, introduces a more dramatic and grounded feel, often used to create striking contrast in modern designs.

Pattern Play and Layout Creativity

Tile selection extends beyond material into the realm of layout and pattern. The way tiles are arranged can redefine the entire space, even when using a simple design. Classic patterns such as herringbone and chevron add movement and sophistication, drawing the eye across the room in a dynamic yet controlled manner.

Subway tiles, long appreciated for their simplicity, take on new life when installed vertically or in stacked formations. This subtle shift transforms a familiar style into something fresh and contemporary. In shower areas, we often recommend extending patterned layouts from floor to ceiling to create a cohesive and immersive effect.

Mosaic tiles provide an opportunity for intricate detail. These smaller pieces can be used to highlight niches, accent walls, or flooring borders. When used thoughtfully, they introduce texture and depth without overwhelming the space. The key lies in balance, ensuring the pattern complements rather than competes with the overall design.

Color Palettes That Define the Mood

Color plays a powerful role in shaping the ambiance of a bathroom. Neutral palettes remain a strong choice for those seeking longevity and versatility. Shades of white, beige, and gray create a serene environment that pairs effortlessly with a variety of fixtures and finishes.

For homeowners interested in a more expressive design, deeper tones offer a striking alternative. Charcoal, navy, and even black tiles create a sense of intimacy and sophistication. When combined with metallic accents such as brushed gold or matte black fixtures, these darker palettes feel both modern and luxurious.

Soft pastels and muted greens have also gained popularity, especially in spaces designed for relaxation. These colors evoke a spa-like atmosphere, bringing a sense of calm that enhances the overall experience of the room. The right lighting further enhances these tones, ensuring they feel warm and inviting rather than flat.

Texture and Finish for Added Dimension

Texture introduces a tactile element that elevates bathroom design beyond visual appeal. Tiles with subtle ridges, fluting, or three-dimensional patterns create depth and interest, especially on feature walls. These designs interact with light in unique ways, casting gentle shadows that shift throughout the day.

Matte finishes offer a refined and understated look, often preferred for flooring due to their slip-resistant properties. Glossy finishes, on the other hand, reflect light and make walls feel brighter and more open. Combining these finishes within a single space creates contrast and balance, enhancing the overall design without overwhelming it.

Handcrafted tiles have also become increasingly sought after. Their slight imperfections and variations in glaze bring character and authenticity, making the space feel curated and personal. These tiles work particularly well in accent areas, where their artistry can be appreciated up close.

Seamless Integration with Fixtures and Features

Tile does not exist in isolation. Its success depends on how well it integrates with the rest of the bathroom elements. Vanities, fixtures, lighting, and hardware all play a role in shaping the final look. A cohesive design ensures each component complements the others, creating a unified and polished result.

In our projects, we pay close attention to transitions between surfaces. The way floor tiles meet wall tiles, or how a backsplash aligns with a vanity, can significantly impact the visual flow. Clean lines and thoughtful detailing contribute to a sense of order and sophistication.

Shower niches, benches, and feature walls provide opportunities to highlight tile in creative ways. Contrasting colors or patterns in these areas draw attention without disrupting the overall harmony. These details, when executed with care, elevate the bathroom from functional to exceptional.

Practical Considerations That Guide Selection

Beauty alone is not enough when selecting bathroom tile. Durability, maintenance, and safety are equally important. Porcelain tiles offer excellent resistance to moisture and wear, making them a reliable choice for floors and showers. Slip resistance is a key factor, particularly in areas exposed to water.

Bathroom Tile Ideas

Grout selection also plays a significant role in both aesthetics and maintenance. Lighter grout creates a seamless look but may require more upkeep, while darker grout offers contrast and hides wear more effectively. Advances in grout technology have introduced options that resist staining and mold, providing long-term peace of mind.

Heating systems beneath tile flooring have become increasingly popular, adding comfort during colder months. This feature enhances the overall experience of the bathroom, turning it into a space that feels indulgent as well as practical.

Craftsmanship Makes the Difference

Even the finest tile can fall short without proper installation. Precision, alignment, and attention to detail are essential in achieving a flawless result. At Exquisitely Renovated, our approach emphasizes meticulous preparation and execution, ensuring every tile is placed with care.

From substrate preparation to final sealing, each step contributes to the longevity and performance of the installation. Our clients trust us to deliver not only a beautiful outcome but also one that stands the test of time. This commitment to quality is what transforms a design concept into a space that truly enhances daily living.

Bringing Your Vision to Life

Bathroom tile offers an extraordinary range of possibilities, allowing each space to reflect the personality and preferences of its owner. With thoughtful planning and expert guidance, even the most complex ideas can be realized with clarity and precision.

Every renovation begins with a vision, and tile often serves as the anchor that brings that vision into focus. With the right selections and skilled execution, a bathroom becomes more than a functional space. It becomes a place of comfort, elegance, and lasting value.

Learn more about how to get started:

Bathroom Remodel Ideas for Small Bathrooms That Feel Effortless and Refined

April 17th, 2026 | Bathroom Remodeling

A small bathroom carries more weight than its square footage suggests. It is one of the most frequently used spaces in a home, a place where the day begins and ends. When designed with care, even the most compact bathroom can feel open, polished, and deeply comfortable. The difference lies in thoughtful planning, precise execution, and a clear vision of how every inch should perform.

At Exquisitely Renovated LLC, small bathroom remodels are approached with the same level of craftsmanship and attention given to expansive primary suites. Limited space simply calls for sharper design decisions. Our bathroom remodeling service in Maryland and Washington, D.C. is built around maximizing function without compromising visual appeal, ensuring each project feels tailored rather than constrained.

A well-designed small bathroom is never an afterthought. It becomes a showcase of efficiency, elegance, and intentional design. The following ideas reflect what truly elevates compact bathrooms, drawn from years of hands-on renovation experience and a deep understanding of what homeowners value most.

Designing for Space Without Sacrificing Style

Creating a sense of openness begins long before materials are selected. Layout is the foundation of every successful remodel, especially in a small bathroom. Poor spatial planning can make even high-end finishes feel cramped, while a smart layout can make modest selections feel luxurious.

In many cases, reconfiguring plumbing fixtures provides the greatest return. Shifting a vanity slightly or opting for a corner-mounted sink can open up walking space in a noticeable way. Wall-mounted toilets and floating vanities create visual continuity along the floor, which makes the room feel less confined.

Equally important is visual flow. When the eye can move uninterrupted across surfaces, the space feels larger than it is. This is why minimizing abrupt transitions between materials and colors is so effective. A seamless layout is not just functional, it brings a sense of calm and order to the entire room.

The Power of Light in Compact Bathrooms

Lighting has a remarkable influence on how a bathroom feels. In small spaces, it becomes a defining element rather than a finishing touch. A poorly lit bathroom can feel closed in, even if the layout is efficient.

Layered lighting works best. Ambient lighting provides overall illumination, while task lighting around the vanity ensures clarity for daily routines. Accent lighting can subtly highlight architectural features or tile work, adding depth without clutter.

Natural light, when available, should always be enhanced rather than obstructed. Frosted glass windows, slim-profile shades, or even a strategically placed mirror can amplify daylight without compromising privacy. When natural light is limited, warm-toned LED fixtures can replicate a soft, inviting glow that avoids the harshness often associated with smaller rooms.

Smart Storage That Blends Seamlessly

Storage is one of the most common concerns in small bathroom remodels. The goal is not simply to add more storage, but to integrate it in a way that feels intentional and unobtrusive.

Built-in niches within shower walls eliminate the need for bulky caddies. Recessed medicine cabinets provide hidden storage without protruding into the room. Floating shelves, when styled minimally, can add function without overwhelming the space.

smart storage in bathroom

Custom cabinetry often makes the greatest impact. Tailored vanities designed specifically for the dimensions of the room ensure that no space is wasted. Soft-close drawers, internal organizers, and vertical storage compartments bring a level of refinement that standard solutions rarely achieve.

A well-organized bathroom does more than reduce clutter. It enhances the daily experience, creating a sense of order that feels both practical and calming.

Choosing Materials That Enhance Space

Material selection plays a subtle yet powerful role in shaping perception. In small bathrooms, the right materials can visually expand the room, while the wrong choices can make it feel tighter.

Light, neutral tones remain a reliable foundation. Soft whites, warm beiges, and muted grays reflect light and create an airy atmosphere. That said, depth can still be introduced through texture rather than heavy contrast. Matte finishes, natural stone patterns, and lightly veined surfaces add character without overwhelming the space.

Large-format tiles are particularly effective. Fewer grout lines create a cleaner look, which helps walls and floors appear more continuous. Extending the same tile from floor to shower walls can further enhance this effect, giving the impression of a larger footprint.

Glass shower enclosures are another essential consideration. Clear glass allows the eye to travel through the space uninterrupted, making the bathroom feel more open compared to traditional curtains or framed enclosures.

Elevating the Shower Experience

In small bathrooms, the shower often becomes the focal point. A well-designed shower can elevate the entire room, both visually and functionally.

Curbless showers are increasingly popular, especially in compact spaces. By eliminating the threshold, the floor flows seamlessly from one area to another, creating a clean and modern look. This approach also improves accessibility, making it a practical choice for long-term use.

Frameless glass enclosures enhance openness while showcasing tile work. Inside the shower, thoughtful details such as built-in benches or niches add convenience without crowding the space.

Shower fixtures also contribute to the overall experience. Rainfall showerheads, handheld options, and thermostatic controls bring comfort and precision into everyday routines. These elements may seem small individually, yet together they create a refined, spa-like atmosphere.

Mirrors That Expand and Reflect

Mirrors are one of the most effective tools for visually enlarging a small bathroom. Their placement and scale can dramatically influence how the room is perceived.

A large mirror above the vanity reflects both light and space, doubling the visual depth of the room. Extending the mirror across the full width of the wall can create an even more expansive effect.

Backlit mirrors add a layer of sophistication while improving functionality. The soft glow enhances visibility and contributes to a calm, inviting ambiance.

In some designs, mirrored surfaces can be incorporated beyond the vanity. Subtle use on cabinet fronts or accent walls can amplify light without feeling excessive when done with restraint.

Hardware and Fixtures That Make a Statement

Small bathrooms benefit from a focused design approach, where every detail carries weight. Hardware and fixtures are no exception. When chosen thoughtfully, they can elevate the entire space.

Finishes such as brushed nickel, matte black, and warm brass each bring a distinct character. Consistency across fixtures ensures a cohesive look, while slight variations in texture can add depth.

Compact fixtures designed specifically for smaller spaces are essential. Slim-profile faucets, narrow sinks, and space-saving toilets maintain functionality without overwhelming the layout.

Attention to detail is what sets a refined bathroom apart. Clean lines, balanced proportions, and high-quality materials create a sense of quiet confidence that resonates throughout the space.

Incorporating Personality Without Overcrowding

A small bathroom should still feel personal and inviting. The key lies in restraint. Carefully chosen accents can bring warmth and character without adding visual clutter.

Subtle patterns in tile or wallpaper can create interest without dominating the room. A single statement wall or a unique vanity finish can serve as a focal point.

Textiles also play a role. Plush towels, a well-crafted bath mat, and coordinated accessories add softness and comfort. Even small touches, when thoughtfully selected, contribute to a cohesive and welcoming environment.

Plants, when used sparingly, introduce a natural element that enhances the overall atmosphere. Low-maintenance options thrive in bathroom conditions and bring a refreshing sense of life to the space.

Craftsmanship That Defines the Final Result

A small bathroom remodel or renovation leaves little room for error. Every line, joint, and finish is more visible, which makes craftsmanship a defining factor in the outcome.

Precision in tile installation, seamless cabinetry, and perfectly aligned fixtures all contribute to the overall experience. These details may not always be consciously noticed, yet they shape how the space feels.

Craftsmanship That Defines the Final Result

At Exquisitely Renovated LLC, the emphasis on quality workmanship ensures that each element comes together effortlessly. From initial design to final installation, the focus remains on delivering a bathroom that feels cohesive, polished, and built to last.

Creating a Space That Feels Effortless

A successful small bathroom remodel is not about adding more, it is about choosing wisely. Every decision should serve a purpose, balancing practicality with visual appeal.

When layout, lighting, materials, and craftsmanship align, the result is a space that feels far greater than its dimensions. It becomes a room that supports daily routines with ease while offering a sense of comfort and refinement.

Small bathrooms hold immense potential. With the right approach, they become some of the most rewarding spaces to transform, offering both immediate enjoyment and lasting value for the home.

Learn more about how to get started:
How Deep Bathroom Cabinets Should Be: A Professional Guide to Smart Bathroom Storage

March 19th, 2026 | Bathroom Remodeling

Bathroom storage has a quiet but powerful influence on how a space feels and functions. Cabinet depth may sound like a small technical detail, yet it shapes the daily experience of using a bathroom. The right depth keeps essentials within reach, preserves walking space, and supports a clean, organized design.

At Exquisitely Renovated, cabinet depth is one of the details we evaluate early in every bathroom renovation project. Homeowners often focus on finishes, tile, and lighting, yet storage dimensions determine how comfortable and practical the room will be for years to come. A beautiful vanity loses its appeal quickly if drawers cannot hold basic toiletries or if cabinet doors crowd the walkway.

A thoughtful approach to cabinet depth ensures storage works naturally with the layout. Proper sizing supports plumbing placement, keeps the room feeling open, and allows daily routines to unfold smoothly. Understanding standard dimensions and when adjustments make sense can help homeowners plan a bathroom that balances elegance with everyday practicality.

Standard Bathroom Cabinet Depth

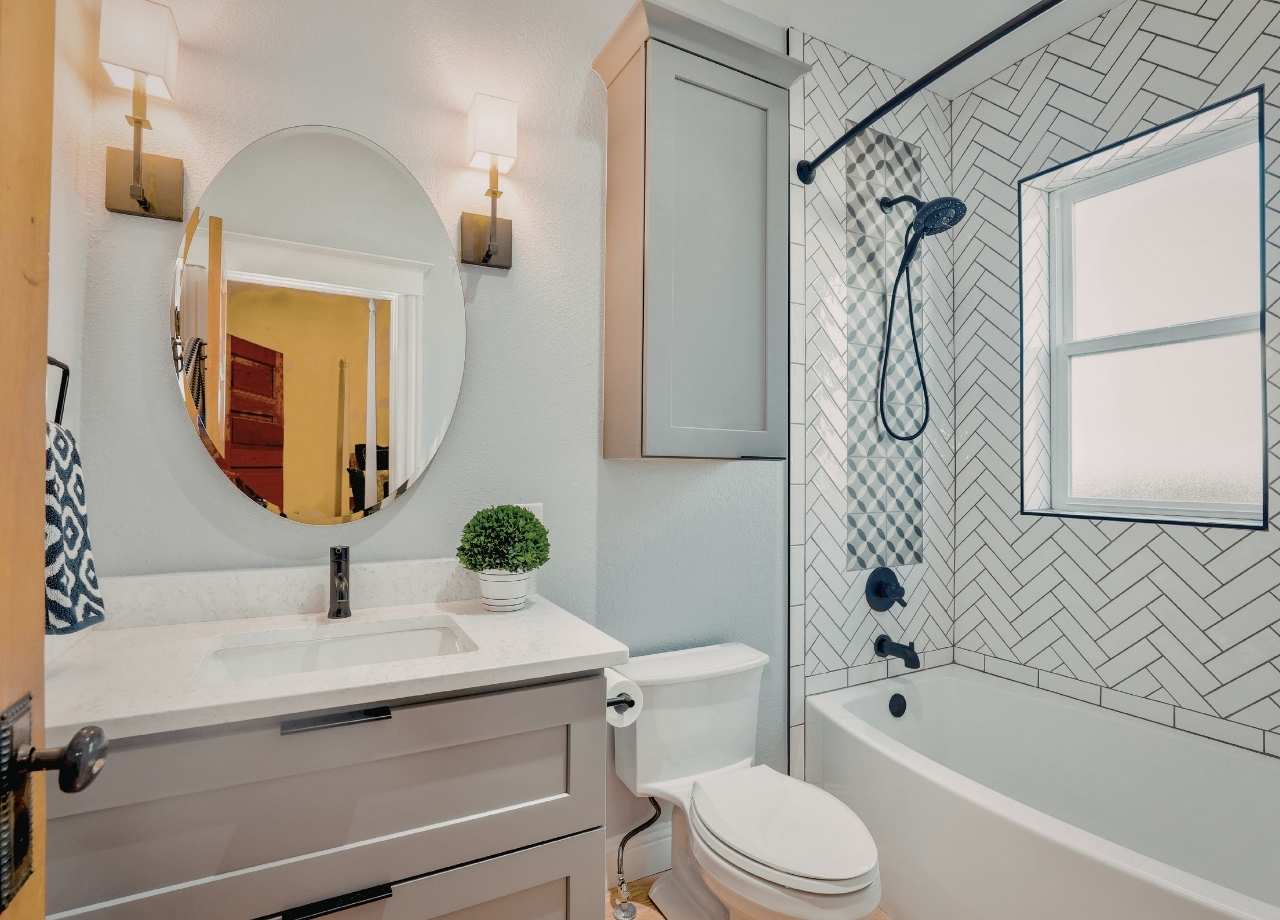
Most bathroom cabinets fall within a fairly predictable range of depths. The most common measurement for standard vanity cabinets is 21 inches deep, measured from the wall to the front edge of the countertop. This size has become the industry standard because it offers enough interior storage while maintaining comfortable clearance in typical bathroom layouts.

In smaller bathrooms, particularly powder rooms or narrow guest baths, cabinet depth often reduces to 18 inches. This slightly slimmer profile creates additional walking space without sacrificing too much storage. Shallow vanities work especially well where the door swing or traffic flow limits how far cabinets can extend into the room.

Custom cabinetry allows for adjustments outside these standard sizes. Some large primary bathrooms feature vanities 22 to 24 inches deep, which creates generous storage and accommodates larger sinks or double vanity layouts. The extra depth can support deeper drawers, pull-out organizers, and integrated electrical outlets for styling tools.

Professional designers rarely choose cabinet depth in isolation. The surrounding layout, the placement of fixtures, and the overall scale of the room all influence the final measurement.

Why Cabinet Depth Matters More Than Most People Think

Cabinet depth shapes more than storage capacity. It influences how the entire bathroom feels and functions. When cabinets extend too far into the room, movement becomes restricted and the space feels cramped. A cabinet that is too shallow, on the other hand, limits usable storage and forces clutter onto countertops.

One of the most noticeable effects appears in front of the vanity. Adequate clearance between the vanity and opposing walls or fixtures keeps the bathroom comfortable to navigate. Designers generally aim for at least 30 inches of clearance, though larger bathrooms benefit from even more space.

Why Cabinet Depth Matters

Cabinet depth also interacts with sink placement. Many modern sinks require adequate depth beneath the countertop to accommodate plumbing while still leaving room for drawers. Poor planning often leads to false drawer fronts or unusable storage areas.

From a visual standpoint, cabinet depth influences balance and proportion. A vanity that feels properly scaled to the room enhances the sense of harmony within the space.

Recommended Depth for Different Bathroom Types

Not all bathrooms share the same storage needs. Cabinet depth often shifts depending on the room’s purpose, the available square footage, and the household’s lifestyle.

Powder Rooms

Powder rooms tend to have limited space, making shallow cabinetry a practical solution. Depths of 16 to 18 inches work well here, especially when paired with compact sinks or wall-mounted faucets.

These smaller cabinets maintain visual lightness while leaving enough room for hand soap, towels, and basic supplies. A slightly slimmer vanity also helps prevent the room from feeling boxed in.

Guest Bathrooms

Guest bathrooms benefit from a little more storage. A depth of 18 to 21 inches strikes a comfortable balance between accessibility and function.

Cabinets at this depth provide space for toiletries, cleaning supplies, and spare linens without overwhelming the layout. When designing guest bathrooms, we often incorporate interior organizers or drawer dividers to keep the space tidy and welcoming for visitors.

Primary Bathrooms

Primary bathrooms usually call for deeper cabinetry. The people who use these spaces daily require storage for grooming products, skincare items, and personal accessories.

Depths of 21 to 24 inches are common in these bathrooms, especially when paired with double vanities. Deeper cabinets allow for full-extension drawers, vertical storage compartments, and pull-out shelving that keeps items visible and easy to access.

Large primary bathrooms also benefit from additional storage towers or linen cabinets that match the vanity depth.

The Role of Countertop Overhang

Cabinet depth alone does not determine the full projection of a vanity. Countertops typically extend about one inch beyond the cabinet face, which creates a comfortable edge and protects cabinet surfaces from water exposure.

This small overhang plays an important role in durability and usability. It prevents water from running down cabinet doors and provides a subtle visual transition between materials.

Designers also consider sink placement when calculating the total depth of the vanity assembly. Vessel sinks or large undermount sinks may require adjustments to maintain proper proportions and comfortable reach.

When we plan bathroom renovations, we review cabinet depth alongside countertop thickness and sink style to ensure every component aligns correctly.

Storage Efficiency Inside the Cabinet

The interior design of a cabinet is just as important as its outer dimensions. Depth creates opportunity for smarter storage solutions that reduce clutter and improve organization.

Deep drawers work particularly well in bathroom vanities. Unlike traditional cabinet doors with shelves, drawers allow users to see everything at a glance. This design prevents items from getting lost in the back of the cabinet.

Pull-out trays, sliding organizers, and built-in electrical outlets are becoming increasingly popular features. These additions turn cabinet depth into practical, accessible storage rather than wasted space.

Many homeowners also appreciate vertical compartments for hair tools. These narrow sections keep styling equipment upright and safe while still allowing cords to remain plugged in.

Thoughtful interior planning ensures the cabinet’s depth delivers real functionality rather than unused space.

Wall Cabinets and Medicine Cabinet Depth

Bathroom storage extends beyond the vanity. Wall cabinets and medicine cabinets also require careful sizing to maintain balance within the room.

Standard medicine cabinets usually measure 4 to 5 inches deep. This size accommodates toiletries and medications without protruding too far from the wall. Recessed medicine cabinets offer an even cleaner look since they sit partially inside the wall cavity.

Wall-mounted cabinets that store towels or supplies often range from 6 to 12 inches deep. These cabinets provide meaningful storage while maintaining a light visual footprint above the vanity or toilet area.

The goal is to keep wall storage practical while preserving openness within the bathroom. Cabinets that extend too far outward can make the room feel crowded.

Custom Cabinet Depth for Unique Layouts

Every bathroom has its own spatial challenges. Older homes often contain narrow layouts, unusual plumbing placement, or architectural features that affect cabinetry dimensions.

Custom Cabinet

Custom cabinetry offers flexibility when standard sizes do not fit the room comfortably. Slight adjustments to depth can improve traffic flow, accommodate plumbing lines, or align cabinets with architectural elements.

Custom depth can also support accessibility needs. Some homeowners prefer slightly shallower cabinets that make reaching the back of drawers easier. Others choose deeper cabinets for expanded storage in large primary suites.

During renovation planning, careful measurement and layout testing ensure the cabinetry integrates naturally with the room.

How Professionals Determine the Right Cabinet Depth

Selecting the right cabinet depth involves more than choosing a number from a catalog. Designers evaluate several factors before finalizing dimensions.

The overall bathroom size is the starting point. Larger rooms allow for deeper cabinetry without sacrificing comfort. Smaller bathrooms benefit from slimmer profiles that preserve movement space.

Plumbing location also plays a significant role. Drain pipes and water lines affect where drawers and shelves can be placed. Skilled cabinet design accounts for these mechanical elements without compromising storage.

Lifestyle needs also shape cabinet depth. A busy household with multiple users often requires deeper drawers and more interior organization. Minimalist spaces may function well with slightly shallower cabinets and fewer compartments.

Careful planning ensures the cabinet depth enhances daily convenience rather than becoming a limitation.

Creating Balance Between Storage and Space

Bathroom design always involves a balance between storage and openness. Cabinets should feel substantial enough to hold everyday essentials while still allowing the room to breathe.

Proper cabinet depth contributes to that balance. When cabinets align with the scale of the room, the entire space feels more comfortable and intentional. Storage remains accessible, walkways stay clear, and the visual flow of the bathroom remains calm and organized.

This level of planning reflects the difference between a standard installation and a carefully designed renovation. At Exquisitely Renovated, we pay close attention to dimensions like cabinet depth because they quietly shape how a space performs over time.

The most successful bathrooms combine thoughtful measurements with quality craftsmanship. Cabinet depth may appear to be a small decision, yet it influences storage capacity, circulation, and overall comfort. When chosen wisely, it supports a bathroom that feels effortless to use every single day.

Learn more about how to get started:

Small Bathroom Remodel Ideas That Make a Big Impact

March 19th, 2026 | Bathroom Remodeling

Small bathrooms often carry the heaviest daily use in a home. Guests rely on them, families move through them constantly, and homeowners expect them to feel comfortable and organized despite their modest footprint. With thoughtful design and precise craftsmanship, a small bathroom can feel polished, functional, and visually open.

At Exquisitely Renovated LLC, many homeowners approach us with a common concern: their bathroom feels cramped, outdated, or inefficient. A carefully planned bathroom renovation changes that experience completely. Through intentional layout planning, smart material choices, and refined finishes, even the smallest room can deliver comfort and elegance.

A well executed small bathroom remodel is not about adding square footage. It is about making every inch purposeful. When space is treated with care and creativity, the result feels far larger than the floor plan suggests.

Why Small Bathrooms Deserve Thoughtful Design

Small bathrooms leave little room for design mistakes. Every fixture, surface, and storage decision influences how the space functions day after day. A poorly placed vanity or oversized tub can make the room feel restricted, yet a carefully balanced design creates flow and ease.

Professional renovation planning brings clarity to that process. Contractors and designers evaluate circulation, plumbing placement, lighting, and storage long before construction begins. That level of preparation prevents overcrowding and ensures the room feels intentional rather than improvised.

A small bathroom also presents an opportunity to introduce high quality materials in a manageable space. Premium tile, custom cabinetry, and elegant lighting become attainable investments when the square footage remains compact. Many homeowners find that their smallest bathroom becomes one of the most visually refined rooms in the home.

Smart Layout Planning

Layout planning sets the foundation for a successful remodel. The goal is to maintain comfort and movement while maximizing usable space. A bathroom may measure only a few feet across, yet the right configuration can completely change how it feels.

Floating vanities have become a favorite choice for smaller bathrooms. By lifting cabinetry off the floor, the design reveals more surface area and creates a sense of openness. The visible flooring beneath the vanity helps the room appear larger and less confined.

Corner sinks also offer a clever solution when traditional layouts feel restrictive. Tucking a compact sink into a corner opens up circulation space and reduces visual crowding. This approach works particularly well in powder rooms or narrow guest bathrooms.

Another popular strategy involves replacing a bulky bathtub with a sleek walk in shower. A carefully designed shower enclosure frees up valuable floor space while maintaining comfort and accessibility.

Space Enhancing Fixtures

Fixture selection influences how spacious a bathroom appears. Oversized vanities, deep cabinetry, and heavy fixtures can overwhelm a compact room. Modern manufacturers now offer streamlined alternatives that maintain performance without dominating the space.

Wall mounted toilets are one such innovation. The tank is concealed within the wall, leaving only the bowl visible. This design reduces visual bulk and opens up floor area beneath the fixture. The result feels clean, modern, and surprisingly spacious.

Compact vanities with integrated sinks also support efficient design. These units combine storage and plumbing in a streamlined form, eliminating unnecessary bulk. When paired with elegant hardware and natural stone countertops, they maintain a luxurious feel without overwhelming the room.

Fixtures with soft curves and lighter finishes help maintain visual balance. Chrome, brushed nickel, and matte brass reflect light subtly and contribute to a refined atmosphere.

Storage Without Clutter

Storage remains essential in any bathroom, regardless of size. Towels, toiletries, and cleaning supplies all require dedicated space. Without thoughtful planning, these necessities quickly create clutter.

Recessed shelving offers an elegant solution. Built directly into the wall cavity, recessed niches provide storage without extending into the room. Shower niches are particularly popular for storing shampoo and soap, keeping surfaces clean and organized.

Vertical cabinetry can also transform a compact bathroom. Tall, narrow storage units use upward space that might otherwise remain unused. This design keeps essential items accessible without crowding the floor.

Medicine cabinets have also evolved in recent years. Modern recessed cabinets include mirrored doors and interior shelving that provide practical storage while maintaining a sleek appearance. When integrated into the wall, they appear nearly invisible.

Custom millwork often provides the best solution in tight spaces. A tailored cabinet built to exact dimensions ensures every inch contributes to storage and functionality.

Lighting and Mirrors That Expand the Room

Lighting dramatically influences how spacious a bathroom feels. Poor lighting creates shadows and visual compression, which makes a small room appear even smaller.

Layered lighting solves this issue effectively. A balanced design includes ambient ceiling lighting, focused vanity lighting, and subtle accent lighting. Each layer contributes to clarity and comfort.

Wall mounted sconces positioned beside the mirror deliver flattering illumination for daily grooming tasks. This arrangement also reduces harsh shadows across the face.

Mirrors play an equally important role. A large mirror reflects light throughout the room and visually doubles the sense of space. Many designers recommend extending the mirror across the width of the vanity or even wall to wall.

Backlit mirrors have become increasingly popular in modern bathroom renovations. Their soft glow enhances visibility while adding a refined, contemporary touch.

Tile and Color Strategies for Small Bathrooms

Material choices strongly influence how large a bathroom appears. The right combination of tile, color, and pattern can create a sense of depth and openness.

Large format tiles are often recommended for compact spaces. Fewer grout lines produce a smoother visual surface, which helps the room feel less busy. When the eye moves easily across the walls and floor, the space appears larger.

Tile and Color Strategies for Small Bathrooms

Neutral color palettes also support a calm, spacious atmosphere. Soft whites, warm beiges, and gentle gray tones reflect light beautifully and create visual continuity.

Vertical tile patterns can subtly increase the perceived ceiling height. Tiles installed in a vertical orientation draw the eye upward, adding a sense of elevation within the room.

Natural stone textures add richness without overwhelming the space. Marble inspired porcelain tiles remain a popular option for homeowners seeking timeless elegance in a compact footprint.

Glass and Visual Openness

Shower enclosures can easily dominate a small bathroom when framed with heavy metal or bulky doors. Modern design often favors clear glass panels that maintain openness.

Frameless glass shower enclosures create uninterrupted sightlines throughout the room. With minimal hardware and clean edges, the shower area blends seamlessly into the surrounding space.

Curbless shower designs offer an even greater sense of openness. The floor tile continues directly into the shower area, eliminating visual barriers. This approach enhances accessibility and creates a sleek, modern aesthetic.

Transparent materials allow light to travel freely across the room. This simple design decision can dramatically improve the perceived size of a small bathroom.

Finishing Touches That Elevate the Space

The final details of a renovation often determine how polished the bathroom feels. Hardware, accessories, and decorative elements contribute to the overall atmosphere.

Coordinated finishes create visual harmony. Faucets, towel bars, cabinet handles, and lighting fixtures should share a consistent finish to maintain a refined appearance.

Minimalist accessories help preserve openness. A few carefully selected elements such as a sculptural soap dispenser, neatly folded towels, or a small plant add warmth without creating clutter.

Textiles also influence comfort. Soft cotton towels, a woven bath mat, and subtle window treatments add texture and softness within a room defined by tile and stone.

Professional craftsmanship ensures these elements come together seamlessly. Precision tile installation, clean grout lines, and carefully aligned fixtures create a sense of quality that homeowners notice every day.

Bringing It All Together

A bathroom remodel represents one of the most rewarding upgrades a homeowner can undertake. With thoughtful design, compact spaces can achieve the same level of beauty and comfort found in larger bathrooms.

At Exquisitely Renovated LLC, we approach each renovation with careful planning and attention to detail. Every fixture placement, lighting choice, and material selection contributes to a finished space that feels balanced and inviting.

A well designed small bathroom supports daily routines with ease. It welcomes guests gracefully and provides homeowners with a space that feels calm, refined, and thoughtfully crafted. Even the most compact footprint can deliver remarkable results when design and craftsmanship work together.

Learn more about how to get started:
Bathroom Cabinet Renovation Ideas That Elevate Style and Function

March 19th, 2026 | Bathroom Remodeling

A well-designed bathroom offers more than convenience. It provides comfort at the beginning and end of every day. Cabinets hold a quiet but powerful role in shaping that experience. Storage, visual balance, and craftsmanship all come together in this single feature.

Many homeowners contact Exquisitely Renovated LLC when their bathroom feels outdated or cluttered. Cabinetry often sits at the center of that frustration. Aging materials, inefficient layouts, and poor lighting around storage areas can make even a spacious bathroom feel cramped. During our bathroom renovation projects across Maryland and Washington D.C., cabinet upgrades frequently become the turning point that reshapes the entire room.

Thoughtful cabinet renovation brings beauty and order into a space that handles daily routines. Careful material selection, intentional layouts, and refined finishes can turn simple storage into a striking focal point. The following ideas highlight ways to approach bathroom cabinet renovations with style, practicality, and lasting value.

Why Bathroom Cabinets Deserve Special Attention During Renovation

Cabinets influence more than storage capacity. They affect how easily people move through their daily routines. Poor cabinet placement often leads to cluttered countertops, limited drawer access, and awkward movement around the vanity area.

A carefully planned cabinet renovation corrects those frustrations. Deeper drawers provide space for hair tools and grooming products. Vertical storage clears crowded countertops. Custom compartments protect smaller items from getting lost in the back of drawers.

Cabinet design also shapes the visual character of the bathroom. The color, door style, and hardware all contribute to the atmosphere of the room. A dated vanity with worn laminate doors can instantly age an otherwise attractive space. Replacing or redesigning cabinets introduces a fresh design direction that complements new tile, lighting, and fixtures.

Custom Built Cabinets That Maximize Every Inch

Tailored Storage for Modern Lifestyles

Standard cabinet sizes rarely match the way families actually use their bathrooms. Custom cabinetry solves that mismatch by designing storage around real routines.

Drawers with built in dividers keep grooming tools organized. Pull out shelves allow easy access to cleaning supplies stored below the sink. Hidden outlets inside cabinets create convenient charging stations for electric toothbrushes or shavers.

Homeowners often discover that custom cabinets allow them to store more items while making the bathroom appear cleaner and more open. Storage works quietly behind the scenes while the visual design remains calm and elegant.

Smart Layouts for Shared Bathrooms

Shared bathrooms require careful planning. Two people using the space at once need separate storage zones that prevent crowding around the vanity.

A dual vanity with independent drawer systems gives each person a defined space for their personal items. Vertical cabinets placed between mirrors create additional storage without widening the vanity. These thoughtful arrangements reduce clutter and help mornings move more smoothly.

Custom cabinetry gives designers the freedom to adapt layouts to the room rather than forcing the room to adapt to prebuilt cabinet sizes.

Floating Vanities That Create a Light, Modern Feel

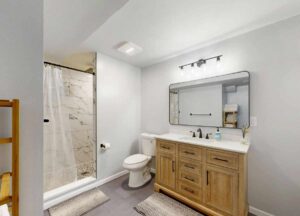
Floating vanities have become a favorite choice in many bathroom renovations. These cabinets mount directly to the wall, leaving open floor space beneath the unit.

The visual effect makes the room feel larger and lighter. This approach works particularly well in smaller bathrooms where floor space is limited. With the vanity lifted from the ground, floor tile continues uninterrupted across the room, creating a sense of openness.

Floating cabinets also simplify cleaning. A quick sweep beneath the vanity removes dust and debris without awkward corners or tight spaces.

Lighting can further enhance the floating effect. Soft LED strips installed beneath the cabinet produce a gentle glow that highlights the design and adds subtle nighttime lighting. This detail introduces elegance without overwhelming the room.

Rich Wood Tones That Add Warmth and Character

Painted cabinets remain popular, yet natural wood has returned as a strong design statement. Warm walnut, white oak, and medium toned maple bring depth and texture to bathroom interiors.

Wood grain creates visual interest that paint alone cannot provide. When paired with stone countertops and soft lighting, the result feels refined and inviting. Many homeowners appreciate the sense of craftsmanship that real wood cabinetry conveys.

Moisture resistant finishes allow wood cabinets to perform well in humid bathroom environments. Professional sealing techniques protect the surface from daily exposure to steam and water.

In renovation projects where homeowners want a balance between modern style and classic character, natural wood cabinetry often becomes the centerpiece that ties the entire design together.

Cabinet Colors That Refresh the Entire Bathroom

Color selection plays a major role in cabinet renovations. The right shade can completely shift the mood of the bathroom.

Soft white cabinets remain a timeless choice. They brighten the room and reflect light across mirrors and tile surfaces. This color works especially well in bathrooms with limited natural light.

Deep navy or charcoal cabinets introduce contrast and elegance. Paired with brass or brushed gold hardware, darker tones bring a sophisticated atmosphere to the space.

Bathroom Cabinet

Muted greens and warm taupe shades have also grown in popularity. These colors create a calming environment that suits the private nature of a bathroom retreat.

Cabinet color decisions should consider the entire design plan, including wall tile, flooring, and lighting. Professional design guidance helps ensure that each element works together rather than competing for attention.

Hidden Storage That Reduces Visual Clutter

Bathrooms accumulate small items quickly. Toothpaste, cosmetics, medications, skincare products, and hair accessories can overwhelm countertops if storage solutions fall short.

Hidden storage features keep those items accessible yet out of sight. Pull out trays within drawers allow easy organization of daily essentials. Vertical pull out cabinets beside the vanity create narrow storage areas for tall bottles and cleaning products.

Medicine cabinets recessed into the wall offer another subtle solution. Mirrors conceal spacious storage without adding bulk to the room. Interior shelving keeps personal items neatly arranged while maintaining a clean exterior appearance.

These hidden storage details often become a homeowner’s favorite part of the renovation. The bathroom maintains a peaceful appearance even during busy mornings.

Statement Hardware That Elevates Cabinet Design

Cabinet hardware functions like jewelry for the bathroom. The right handles or knobs can enhance the entire vanity without major construction changes.

Brushed brass handles add warmth and elegance. Matte black hardware creates a modern contrast against lighter cabinet colors. Polished nickel offers a classic look that complements many design styles.

Scale also matters. Oversized handles on large drawers provide a bold architectural touch. Smaller knobs on upper cabinets maintain visual balance.

Hardware upgrades remain one of the simplest ways to refresh existing cabinetry. During full cabinet renovations, selecting hardware early in the design process ensures that door styles and finishes complement the chosen pieces.

Integrated Lighting That Improves Function and Atmosphere

Lighting within cabinets has become an increasingly popular feature in high quality bathroom renovations. Interior drawer lighting activates automatically when the drawer opens, helping homeowners locate items quickly during early mornings or late evenings.

Under cabinet lighting serves two purposes. It highlights the cabinet design while adding soft ambient light to the room. This lighting layer works beautifully during nighttime when full overhead lights feel too bright.

Mirror cabinets with built in lighting create excellent visibility for grooming tasks. Balanced lighting reduces harsh shadows on the face, which improves comfort during shaving or makeup routines.

These lighting elements require thoughtful electrical planning, yet the finished result greatly enhances daily convenience and visual appeal.

Cabinet Renovation as Part of a Thoughtful Bathroom Design

Bathroom cabinet renovations rarely exist in isolation. Cabinets interact with flooring, lighting, plumbing fixtures, and wall finishes. A thoughtful renovation plan considers how these elements connect visually and functionally.

During bathroom remodeling projects completed by Exquisitely Renovated LLC, cabinetry often sets the direction for the entire design. Once cabinet style, color, and layout are established, other design choices begin to align naturally. Countertops complement the cabinet tone. Lighting fixtures reinforce the atmosphere. Hardware ties the entire room together.

This coordinated approach produces bathrooms that feel calm, balanced, and carefully crafted.

Creating a Bathroom That Works Beautifully Every Day

Bathroom cabinets shape daily routines in subtle yet powerful ways. Smart storage solutions remove clutter and frustration. Elegant materials elevate the overall atmosphere of the room. Thoughtful layouts support comfort during busy mornings and quiet evenings alike.

A well planned cabinet renovation turns storage into a design feature rather than an afterthought. Floating vanities, natural wood finishes, concealed compartments, and integrated lighting all contribute to a space that feels organized and refined.

Homeowners who approach cabinet renovations with intention often discover that the entire bathroom feels renewed. The room becomes easier to use, easier to maintain, and far more enjoyable to spend time in.

Careful craftsmanship and design planning ensure that those improvements continue delivering comfort and beauty for many years.

Learn more about how to get started:
Damaged Cabinets: How to Address Them with Confidence

February 10th, 2026 | Home Renovations

Damaged cabinets are more than a cosmetic frustration. They signal wear, moisture exposure, structural stress, or installation issues that can quietly affect how a kitchen, bathroom, or commercial space functions day to day. At Exquisitely Renovated LLC, we encounter cabinet damage in homes and businesses across Maryland and Washington D.C., often long before a client realizes the full scope of the problem. Understanding how cabinet damage happens, what it means for the space, and how to address it correctly can save time, expense, and unnecessary disruption later.

Within the first stages of evaluating damaged cabinets, our team often performs careful cabinet repair assessments as part of broader renovation consultations. This allows us to determine whether targeted repairs will restore integrity or if a more thoughtful replacement plan will better serve the space over the long term. This blog explores damaged cabinets from a professional standpoint, grounded in real-world renovation experience, craftsmanship standards, and practical decision-making.

Understanding What Cabinet Damage Really Means

Cabinet damage is rarely a single-issue problem. It often reflects a combination of environmental exposure, material limitations, and daily use patterns. Cabinets are among the hardest working elements in a home or commercial interior. They support weight, endure repeated movement, and face constant exposure to humidity, heat, and cleaning products.

Damage can present subtly at first. A door that no longer aligns, a drawer that resists closing, or a finish that appears dull or uneven may seem minor. Over time, these symptoms often progress into structural concerns that compromise usability and appearance. From a renovation perspective, early recognition makes a measurable difference in outcomes.

Different materials respond to stress in different ways. Solid wood cabinets may show cracks or joint separation. Engineered wood products may swell or delaminate. Thermofoil and laminate finishes can peel or bubble. Recognizing the material involved helps determine whether restoration is realistic or replacement is the wiser route.

Common Causes of Damaged Cabinets

Moisture and Humidity Exposure

Moisture remains the leading cause of cabinet damage, especially in kitchens, bathrooms, and laundry areas. Steam from cooking, plumbing leaks, appliance failures, and poor ventilation all contribute to swelling, warping, and finish breakdown. Even small leaks beneath sinks can cause cabinet bases to deteriorate quietly until the damage becomes visible.

Humidity fluctuations also play a role. Wood expands and contracts with changes in moisture levels. Over time, this movement can loosen joints, crack finishes, and distort door alignment. In older homes, inadequate ventilation compounds the issue, accelerating wear on cabinetry.

Poor Installation or Structural Support

Cabinets rely on precise installation to perform correctly. When cabinets are not properly anchored, leveled, or supported, stress points develop. Doors may sag, drawers may bind, and frames may twist. These issues often appear months or years after installation, making the original cause less obvious to the homeowner.

Improper spacing and insufficient support for heavy loads also contribute to damage. Upper cabinets carrying oversized dishware or commercial-grade storage can pull away from walls if not reinforced correctly. Over time, this compromises both safety and aesthetics.

Material Quality and Age

Not all cabinets are built to the same standard. Lower-quality materials may look acceptable at installation but degrade quickly under normal use. Thin veneers, low-density particleboard, and inferior finishes struggle to withstand moisture and daily wear.

Age alone does not doom cabinets, yet older cabinetry often lacks modern protective finishes and construction methods. When paired with decades of use, even well-built cabinets may reach a point where repairs become less effective.

Signs That Cabinet Damage Requires Attention

Recognizing early warning signs helps prevent small issues from escalating. Cabinets that feel soft at the base, emit a musty odor, or show discoloration often indicate moisture intrusion. Doors that rub, tilt, or refuse to stay closed point toward structural movement or hinge fatigue.

Signs That Cabinet Damage Requires Attention
Finish damage also warrants attention. Peeling, bubbling, or flaking surfaces suggest adhesion failure, frequently linked to moisture or heat exposure. Ignoring these signs allows damage to spread beneath the surface, where repairs become more complex and costly.

In commercial spaces, damaged cabinets may also affect compliance and safety standards. Loose hardware, exposed substrates, and compromised storage can interfere with daily operations and inspections.

Repair Versus Replacement, Making the Right Call

One of the most common questions clients ask involves choosing between repairing damaged cabinets or replacing them entirely. The answer depends on several factors, including material condition, extent of damage, layout goals, and long-term plans for the space.

Repairs make sense when cabinet boxes remain structurally sound and damage is localized. Door replacement, hinge adjustment, refinishing, or base repairs can extend the life of quality cabinetry when performed correctly. Skilled craftsmanship ensures that repairs blend seamlessly and restore proper function.

Replacement becomes the smarter option when damage affects core structural elements or when moisture has compromised multiple cabinet sections. Swollen cabinet boxes, widespread delamination, and mold presence typically indicate deeper issues that repairs cannot reliably solve. Replacement also allows homeowners and business owners to improve layout efficiency, storage capacity, and visual cohesion.

The Hidden Risks of Ignoring Damaged Cabinets

Delaying action on damaged cabinets carries risks beyond appearance. Moisture-damaged cabinetry can harbor mold and mildew, affecting indoor air quality. Structural instability may lead to falling shelves or doors, posing safety concerns.

Damaged cabinets also impact surrounding materials. Moisture can spread to flooring, walls, and countertops, multiplying repair costs. In kitchens, compromised cabinets may affect appliance performance or plumbing access, increasing the likelihood of further damage.

From a property value standpoint, visible cabinet damage detracts from perceived care and maintenance. Buyers and tenants notice these details quickly, often interpreting them as indicators of broader neglect.

Professional Assessment Makes the Difference

Accurate evaluation of cabinet damage requires experience and trained observation. Surface-level issues often mask deeper problems within cabinet boxes, wall attachments, or subflooring. A professional assessment identifies not only what is visible but also what lies beneath.

At Exquisitely Renovated LLC, assessments consider structural integrity, moisture history, material composition, and future use of the space. This comprehensive evaluation supports informed decisions that align with both immediate needs and long-term goals.

Professional insight also helps prioritize repairs. Addressing underlying causes, including ventilation improvements or plumbing corrections, prevents repeat damage and protects the investment.

Preventing Future Cabinet Damage

Prevention begins with thoughtful design and proper installation. Selecting materials suited to the environment, incorporating adequate ventilation, and ensuring precise installation all contribute to cabinet longevity. Protective finishes and moisture-resistant materials perform especially well in kitchens and bathrooms.

Routine maintenance plays an important role as well. Promptly addressing leaks, maintaining caulking, and using appropriate cleaning products preserve finishes and structural components. Simple habits, including wiping spills quickly and avoiding excessive moisture exposure, make a noticeable difference over time.

In commercial settings, regular inspections help identify wear early. High-use environments benefit from durable materials and proactive maintenance schedules that minimize downtime and repair costs.

When Cabinet Damage Signals a Larger Renovation Opportunity

Sometimes damaged cabinets serve as the catalyst for broader improvements. Outdated layouts, inefficient storage, and worn finishes often accompany cabinet deterioration. Addressing cabinets within a larger renovation allows for cohesive upgrades that improve flow, functionality, and visual appeal.

Kitchen and bathroom renovations offer opportunities to reconfigure storage, enhance lighting, and update finishes while resolving underlying damage. Commercial renovations may focus on durability, code compliance, and brand alignment, all while improving daily operations.

Approaching cabinet damage with a long-term vision ensures that solutions add value rather than merely addressing symptoms.

A Thoughtful Approach to Cabinet Restoration

Damaged cabinets deserve careful attention, not quick fixes. Each situation carries unique factors that influence the best course of action. Professional evaluation, quality materials, and skilled workmanship determine whether cabinets regain their integrity and beauty or continue to decline.

From subtle repairs to full replacements, addressing cabinet damage thoughtfully protects the surrounding space and enhances daily use. With the right expertise guiding the process, damaged cabinets become an opportunity to restore confidence in the space and ensure it performs as beautifully as it looks for years to come.

Learn more about how to get started:

Water Leaking From a Bathroom to Ceiling: What It Means

February 10th, 2026 | Bathroom Remodeling

Water leaking from a bathroom into the ceiling below is one of those issues that feels minor at first glance and then steadily reveals a much more serious story. A faint stain, a slow drip, or a soft spot in drywall often signals a hidden failure behind finished surfaces. From our experience working in homes throughout Maryland and Washington D.C., this type of leak rarely stays contained. It tends to spread quietly, compromising structure, finishes, and indoor comfort long before the source becomes obvious.

At Exquisitely Renovated, we see this problem most often during bathroom repair and renovation projects, when ceilings are opened and plumbing systems are finally visible. What homeowners assumed was a small plumbing mishap frequently turns out to be a combination of aging materials, poor installation, and moisture exposure over time. Addressing it correctly requires more than patching drywall or repainting a ceiling. It calls for a clear understanding of how bathrooms function as complete systems, from supply lines to drainage, waterproofing, and ventilation.

A ceiling leak tied to a bathroom above is not just a cosmetic concern. It is an early warning sign that deserves prompt attention, careful diagnosis, and skilled repair.

Why Bathroom Leaks Travel Downward

Bathrooms concentrate water more than any other room in a home. Supply lines feed sinks, toilets, tubs, and showers under constant pressure. Drain lines carry wastewater away several times a day. Surrounding these systems are tiled surfaces, waterproof membranes, subfloors, and framing that all work together to manage moisture.

When any part of this system fails, gravity takes over. Water does not remain neatly contained near the source. It follows framing members, pipe runs, and fasteners until it finds the path of least resistance. That path often leads straight into the ceiling below.

Ceilings hide problems exceptionally well. Drywall can absorb a surprising amount of moisture before showing visible signs. By the time discoloration or sagging appears, the leak may have been active for weeks or months. In multi level homes, we frequently find damage that extends beyond the immediate area, affecting insulation, electrical components, and structural framing.

Common Sources of Bathroom to Ceiling Leaks

Understanding where these leaks typically originate helps explain why surface level fixes almost never last. Each fixture in a bathroom presents its own risks, especially as homes age.

Shower and tub assemblies are among the most frequent culprits. Cracked grout, failed caulk joints, or compromised waterproofing behind tile allow water to bypass visible surfaces. Once behind the wall or under the tub, moisture seeps into the floor system and migrates downward. In many older homes, showers were installed before modern waterproofing standards existed, making slow leaks almost inevitable.

Toilets also cause a significant number of ceiling leaks. A failing wax ring at the toilet base can release water every time the toilet is flushed. This water often travels under the finished floor, soaking the subfloor before dripping into the ceiling below. Because the leak only occurs during use, it can go unnoticed for a long time.

Supply lines and shutoff valves are another common source. Even a pinhole leak in a pressurized line can release a steady stream of water into framing cavities. Over time, this moisture damages wood and drywall while encouraging mold growth.

Drain assemblies for sinks and tubs can loosen or crack as materials expand and contract. These leaks are often subtle, releasing water slowly but consistently. The damage accumulates quietly, which is why ceilings sometimes collapse seemingly without warning.

Early Warning Signs Homeowners Often Miss

Many homeowners only react once water becomes visible on the ceiling below. By that stage, repairs are already more involved. There are usually earlier indicators that something is wrong upstairs.

Persistent musty odors near the bathroom or in rooms below often signal hidden moisture. Paint that begins to bubble, peel, or discolor on a ceiling is another warning sign. Soft or spongy flooring around a tub or toilet suggests subfloor saturation, which almost always affects the ceiling beneath.

In some cases, homeowners notice grout lines darkening or cracking more quickly than expected. This can point to moisture movement behind tile surfaces. A toilet that rocks slightly or feels unstable may indicate a failing seal, even if no water is visible yet.

Recognizing these signals early allows for targeted intervention rather than broad repairs.

What Happens When a Bathroom Leak Is Ignored

Water damage does not remain static. The longer a leak continues, the more extensive and expensive the repairs become. Ceiling drywall weakens as it absorbs moisture, eventually sagging or collapsing. Insulation loses its effectiveness once wet, contributing to comfort issues and higher energy costs.

When a Bathroom Leak Is Ignored
Wood framing exposed to repeated moisture begins to deteriorate. While this process can be slow, it compromises structural reliability over time. Mold growth becomes a real concern in damp, enclosed spaces, especially when ventilation is limited. Mold not only affects indoor air quality but can also complicate repairs, requiring specialized remediation.

Electrical components routed through ceilings add another layer of risk. Moisture near wiring or junction boxes introduces safety concerns that should never be ignored.

The Importance of Accurate Leak Diagnosis

One of the most common mistakes we encounter is treating the visible damage rather than the source. Repainting a stained ceiling or replacing drywall without addressing the underlying leak only delays the inevitable.

Accurate diagnosis involves tracing the path of water back to its origin. This often requires selective opening of ceilings or walls to inspect plumbing connections, waterproofing layers, and structural elements. In renovation projects, we frequently uncover multiple contributing factors rather than a single failure.

Professional assessment ensures that repairs address the full scope of the problem. This approach protects homeowners from recurring damage and unnecessary repeat work.

Repairing the Damage the Right Way

Effective repair begins with stopping the water intrusion completely. Plumbing components must be repaired or replaced using materials suited to modern standards. Shower and tub assemblies may require re waterproofing, not just surface patching. Toilets should be reset with new seals, and supply lines upgraded where age or corrosion is present.

Once the leak is resolved, damaged materials need careful evaluation. Saturated drywall should be removed and replaced. Insulation must be dried or replaced to restore performance. Any compromised framing should be reinforced or repaired to maintain structural integrity.

Ceiling restoration is the final step, not the first. Matching textures, finishes, and paint ensures the repair blends seamlessly with the surrounding space. When handled correctly, there should be no visible reminder of the issue once work is complete.

When Bathroom Leaks Signal a Larger Renovation Need

In many homes, a ceiling leak is not an isolated event but a symptom of an aging bathroom system. Outdated plumbing, inadequate waterproofing, and worn finishes often reach their limits at the same time.

During renovation planning, we frequently recommend addressing these systems comprehensively rather than piecemeal. Updating plumbing, improving waterproofing, and modernizing fixtures reduces the risk of future leaks while improving daily comfort and function. This approach also protects the investment homeowners make in their living spaces.

A well planned bathroom renovation can resolve existing problems while preventing new ones, all without unnecessary disruption.

Preventing Future Bathroom to Ceiling Leaks

Prevention starts with quality installation and proper materials. Bathrooms should be treated as high moisture environments at every layer, not just at the surface. Waterproof membranes, properly sloped shower pans, and secure plumbing connections all play essential roles.

Routine maintenance also matters. Resealing grout and caulk as they age, checking toilet stability, and addressing minor plumbing issues promptly can prevent larger failures. Paying attention to subtle changes in ceilings or floors allows homeowners to act before damage escalates.

Ventilation is another often overlooked factor. Proper exhaust systems reduce humidity, helping finishes and materials perform as intended over time.

Final Thoughts

Water leaking from a bathroom into the ceiling below is never something to dismiss. It reflects a breakdown somewhere within a complex system designed to manage water safely. Treating it with the seriousness it deserves protects not only finishes but also structure, safety, and long term value.

From our vantage point inside walls and ceilings every day, the difference between a quick fix and a lasting solution is expertise, patience, and respect for how homes are built. When leaks are addressed thoughtfully and thoroughly, homeowners regain peace of mind and confidence in their spaces, which is always the true measure of a successful repair.

Learn more about how to get started:
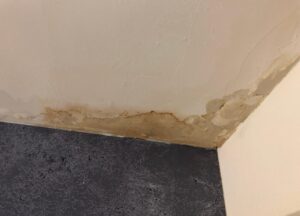
How High Should a Kitchen Cabinet Be?

February 10th, 2026 | Home Renovations

Kitchen cabinetry carries far more responsibility than most homeowners realize. Cabinet height affects how a kitchen looks, how it functions, and how comfortable it feels during everyday use. When cabinetry is installed too high or too low, even the most beautiful finishes cannot compensate for the strain it places on daily routines. At Exquisitely Renovated LLC, we approach cabinet height as a design and construction decision that balances ergonomics, visual proportion, and long-term usability.

This question comes up in nearly every kitchen renovation we design in Maryland and Washington D.C. Homeowners often arrive with measurements they found online, yet real kitchens rarely fit neatly into generalized rules. Ceiling height, appliance selection, homeowner stature, and architectural style all influence the final answer. Our kitchen remodeling services frequently involve fine-tuning cabinet placement so that the space feels intentional rather than assembled from disconnected standards.

Understanding how high kitchen cabinets should be begins with knowing the accepted guidelines, then knowing when and how to adjust them. A well-designed kitchen respects the human body, the home’s structure, and the way the space is actually used.

Standard Kitchen Cabinet Height Guidelines

Most kitchen cabinetry follows industry-established dimensions that serve as a starting point rather than a fixed rule. Base cabinets typically measure 34.5 inches tall before countertops are installed. With a standard countertop thickness of 1.5 inches, the finished working height lands at 36 inches from the floor. This height accommodates the majority of users and aligns with appliance standards.

Upper cabinets are where questions usually arise. In a traditional kitchen layout, upper cabinets are mounted so the bottom of the cabinet sits 18 inches above the countertop surface. When combined with a 36-inch countertop height, the bottom of the upper cabinet is typically positioned 54 inches from the finished floor. This spacing provides enough clearance for small appliances while keeping storage within reach.

Standard upper cabinet heights are usually 30, 36, or 42 inches. The choice among these sizes depends on ceiling height and desired visual impact. In homes with 8-foot ceilings, 30-inch cabinets often leave space above that can be finished with crown molding or left open. With 9-foot ceilings, 36-inch cabinets create a fuller look. For taller ceilings, 42-inch cabinets offer maximum storage and a built-in appearance.

These guidelines establish a baseline, yet they rarely tell the full story. A kitchen that feels effortless comes from adjusting these dimensions to suit the space and the people using it.

Why Cabinet Height Is About More Than Measurements

Cabinet height directly influences comfort, efficiency, and safety. When cabinets are installed too high, homeowners strain their shoulders and backs reaching for everyday items. When installed too low, countertop space feels cramped and the kitchen loses its sense of openness.

Ergonomics play a central role. The average reach height for most adults falls between 60 and 72 inches from the floor. Placing frequently used shelves within this range reduces fatigue and improves workflow. A kitchen should support natural movement, not force constant stretching or stooping.

Visual balance matters just as much. Cabinets that stop short of the ceiling can make a room feel unfinished, especially in newer homes with taller ceilings. Cabinets that extend too high without proper proportion can feel heavy or overpowering. The correct height creates a rhythm between walls, windows, appliances, and lighting.

During our design process, we evaluate how each cabinet height interacts with the room’s architecture. A historic row home in Washington D.C. demands a different approach than a modern open-concept home in suburban Maryland. Cabinetry should respect the home’s character while supporting contemporary living.

Ceiling Height and Its Influence on Cabinet Placement

Ceiling height is one of the most important factors when determining cabinet height. An 8-foot ceiling offers limited vertical space, which requires careful planning to avoid crowding the room. In these kitchens, 30-inch upper cabinets paired with modest crown molding often strike the right balance. This approach preserves breathing room while still offering sufficient storage.

Ceiling Height and Its Influence on Cabinet Placement

With 9-foot ceilings, 36-inch upper cabinets become a natural choice. They reduce the unused space above cabinets and create a more cohesive look. The additional height allows for extra shelving, which is especially valuable for households that cook frequently.

Ceilings measuring 10 feet or higher open the door to 42-inch cabinets or stacked cabinetry designs. In these kitchens, cabinets can extend close to the ceiling, minimizing dust-collecting gaps and delivering a refined, custom appearance. Stacked cabinets also allow homeowners to separate everyday storage from seasonal or display storage.

The key lies in proportion. Cabinet height should complement ceiling height without overwhelming the room. This balance requires experience and a trained eye, not guesswork.

Adjusting Cabinet Height for Homeowner Comfort

Standard cabinet heights serve averages, yet no household is truly average. Homeowner height, mobility, and daily habits deserve careful consideration. A taller homeowner may benefit from slightly higher upper cabinets or increased spacing above the countertop. A shorter homeowner may prefer cabinets lowered by an inch or two to maintain comfortable reach.

In multi-generational homes, flexibility becomes essential. Cabinets that are too high can create barriers for children or older adults. Thoughtful planning places frequently used items in easily accessible zones while reserving higher shelves for occasional use.

We often integrate pull-down shelving, roll-out trays, and soft-close hardware to enhance accessibility without altering the overall cabinet height dramatically. These solutions allow the kitchen to adapt to its users over time, preserving comfort and independence.

Cabinet height should never force homeowners to rely on step stools for everyday tasks. A well-designed kitchen supports natural movement and reduces unnecessary strain.

The Role of Appliances and Fixtures

Appliances significantly affect cabinet height decisions. Range hoods, microwaves, wall ovens, and refrigerators all impose specific clearance requirements. A cabinet layout that ignores these constraints can lead to functional issues or code violations.

Range hoods typically require a specific distance from the cooktop, often between 24 and 36 inches depending on the hood type. This requirement influences how high surrounding cabinets can be mounted. Microwave drawers and built-in microwave cabinets also dictate precise placement to ensure safe and comfortable use.

Refrigerators present another consideration. Counter-depth models align more seamlessly with cabinetry, while standard-depth models may require deeper or taller cabinets to achieve a balanced look. Panel-ready appliances demand even greater precision, as cabinet dimensions must integrate seamlessly with appliance panels.

Lighting fixtures also matter. Under-cabinet lighting requires sufficient clearance and thoughtful placement to illuminate countertops without glare. Cabinet height plays a direct role in how effectively lighting performs its job.

Custom Cabinetry Versus Standard Sizing

Standard cabinet sizes offer convenience and affordability, yet they do not suit every kitchen. Custom cabinetry allows precise adjustments to height, depth, and internal configuration. This flexibility proves especially valuable in homes with uneven ceilings, unique architectural features, or specific accessibility needs.

Custom cabinets can be built to align perfectly with ceiling lines, window heights, and structural elements. They eliminate awkward gaps and create a tailored appearance that elevates the entire kitchen. From a practical standpoint, custom sizing ensures that storage is maximized without sacrificing comfort.

At Exquisitely Renovated LLC, we frequently design kitchens that blend standard and custom elements. This approach balances cost efficiency with design integrity. Cabinet height becomes a deliberate choice rather than a compromise.

Common Mistakes Homeowners Make With Cabinet Height

One of the most common mistakes involves choosing cabinet height based solely on online recommendations. While general guidelines provide useful context, they cannot account for individual kitchens. Another frequent issue arises when cabinets are installed without considering crown molding or ceiling irregularities, leading to visible gaps or misalignment.

Homeowners also underestimate the impact of countertop thickness. Switching from a standard laminate to a thicker stone countertop can alter the relationship between base and upper cabinets. Without proper planning, this change can compress the workspace or disrupt visual balance.

Overlooking future needs presents another risk. A kitchen should remain functional for years, not just at the moment of installation. Cabinet height that feels acceptable today may become inconvenient later if mobility changes or household needs shift.

Avoiding these pitfalls requires experience and foresight, qualities that come from working with a renovation team that understands both construction and design.

How Cabinet Height Shapes the Overall Kitchen Experience

Cabinet height influences how a kitchen feels from the moment someone enters the room. Properly scaled cabinets create a sense of order and calm. They frame the space, guide the eye, and support a smooth workflow.

When cabinets are placed with intention, countertops feel open and inviting. Storage feels accessible rather than hidden or burdensome. The kitchen becomes a space where cooking, gathering, and daily routines unfold naturally.

From a resale perspective, well-proportioned cabinetry signals quality. Buyers may not consciously measure cabinet height, yet they respond to spaces that feel comfortable and refined. Cabinet placement plays a quiet yet powerful role in that impression.

Making the Right Decision for Your Kitchen

Determining how high a kitchen cabinet should be requires more than choosing a number. It involves understanding the home, the people who live there, and the way the kitchen supports daily life. Standard dimensions offer a foundation, yet thoughtful adjustments create kitchens that feel personal and enduring.

At Exquisitely Renovated LLC, we approach cabinet height as part of a larger design conversation. Our role involves guiding homeowners through decisions that balance beauty, comfort, and longevity. When cabinet height is chosen with care, the kitchen gains a sense of ease that enhances every moment spent within it.

A well-designed kitchen does not call attention to its measurements. It simply works, quietly and confidently, day after day.

Learn more about how to get started: