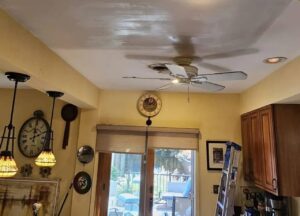
Rowhouses are a defining feature of many neighborhoods throughout Maryland and Washington, D.C. Their historic charm, efficient use of space, and architectural character make them highly desirable homes. Yet many rowhouse owners eventually notice something unsettling: cracks appearing in walls, ceilings, or around doorways. A hairline crack may seem harmless at first glance, but it often raises an important question. Is this simply normal drywall wear, or could it signal foundation settlement beneath the home?
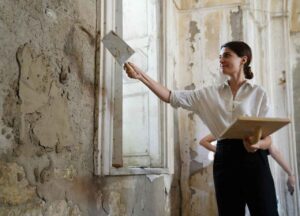
One of the concerns we hear most often at Exquisitely Renovated LLC is whether cracks in walls require attention or are simply part of a home’s natural aging process. During renovation and interior remodeling projects, we often uncover signs of structural movement that have developed gradually over years or even decades. Distinguishing between cosmetic drywall issues and foundation settlement is essential, as the appropriate solution depends entirely on the underlying cause.
Why Cracks Are Common in Rowhouses
Unlike newer suburban homes built on large individual lots, rowhouses operate as part of an interconnected structure. Each home shares walls with neighboring properties, creating a unique set of structural conditions. Changes occurring in one section of a row can sometimes affect adjacent homes as well.
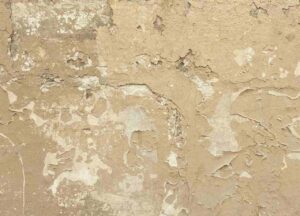
Many rowhouses throughout the Mid-Atlantic region were constructed decades ago, with some dating back more than a century. Building materials naturally age over time. Seasonal moisture fluctuations, temperature changes, settling soils, renovations performed by previous owners, and ongoing structural loading all contribute to gradual movement within the building.
Minor cracking is often a normal part of a home’s aging process. Materials expand and contract as temperatures change. Wood framing can shrink slightly as it dries. Drywall joints may become visible after years of seasonal movement. These cosmetic cracks typically pose little concern.
The challenge lies in determining when cracking moves beyond normal wear and begins indicating structural settlement.
Understanding Normal Drywall Wear
Drywall is designed to create smooth interior surfaces, but it is not immune to movement. Even in structurally sound homes, drywall can develop cracks over time.
One of the most common causes is seasonal expansion and contraction. During humid summers, framing materials absorb moisture and expand slightly. During colder, drier months, those same materials contract. Repeated cycles can stress drywall joints and create small cracks along seams.
Settling that occurs shortly after construction can also produce minor drywall imperfections. Though many rowhouses have existed for generations, newer additions, renovated sections, or recently finished basements may still experience slight adjustments as materials acclimate.
Cosmetic drywall cracks generally share several characteristics:
- Thin hairline appearance
- Limited length
- Consistent width throughout the crack
- Cracks located at drywall seams
- No accompanying door or window issues
- Little to no progression over time
These types of cracks are often straightforward to repair through patching, refinishing, and repainting. Once properly addressed, they may not reappear for many years.
What Foundation Settlement Means
Foundation settlement occurs when the soil beneath a structure shifts, compresses, erodes, or loses its ability to support the building evenly. As portions of the foundation move downward at different rates, stress transfers through the structure above.
All buildings experience some degree of settlement throughout their lifespan. Engineers generally expect a small amount of movement. Problems arise when settlement becomes uneven or excessive.
In urban environments, several factors can contribute to foundation settlement:
Soil Movement and Moisture Changes
Many soils expand when wet and shrink when dry. Significant rainfall, prolonged drought, leaking utility lines, poor drainage, or changes in groundwater conditions can alter soil stability beneath foundations.
Over time, repeated expansion and contraction cycles can create voids or uneven support conditions.
Aging Foundations
Historic rowhouses often feature masonry foundations constructed using techniques and materials that differ from modern standards. While many have performed remarkably well for generations, aging mortar joints, masonry deterioration, and changing site conditions can affect structural performance.
Nearby Construction Activity
Urban development projects can influence surrounding properties. Excavation, utility installation, roadwork, and adjacent construction may temporarily alter soil conditions or vibration levels near existing foundations.
Structural Modifications
Previous renovations sometimes contribute to settlement issues. Removing load-bearing elements, adding additional stories, installing heavy finishes, or modifying support systems without adequate structural planning can redistribute loads throughout the building.
How Settlement Cracks Differ from Drywall Cracks
The location, pattern, and behavior of a crack often reveal valuable clues about its cause.
Settlement cracks typically form as structural components react to uneven movement below. Rather than appearing as simple straight lines along drywall joints, they frequently follow distinctive patterns.
Diagonal cracks extending from the corners of windows and doors are among the most common indicators of foundation-related movement. As the structure shifts, stress concentrates around openings, causing drywall or plaster to crack at angles.
Settlement cracks may also appear as stair-step patterns along masonry walls. These cracks follow mortar joints and can indicate movement within brick or block construction.
Another important characteristic is width variation. Structural cracks often start narrow and widen gradually along their length. Some may continue growing over time.
Homeowners should pay particular attention when cracks are accompanied by other symptoms, including:
- Doors that stick or fail to latch properly
- Windows becoming difficult to open or close
- Uneven or sloping floors
- Gaps forming around trim or moldings
- Separation between walls and ceilings
- Visible exterior masonry cracking
- New cracks appearing repeatedly after repair
When multiple symptoms occur simultaneously, a structural assessment becomes increasingly important.
Why Rowhouses Present Unique Diagnostic Challenges
Diagnosing structural movement in a detached home can be relatively straightforward. Rowhouses introduce additional complexities because neighboring properties share structural components.
Movement occurring in one home can influence adjacent units. A renovation performed next door may alter loading conditions. Differences in maintenance history, moisture management, and foundation performance can create varying settlement patterns along a continuous row.
Historic renovations further complicate the picture. Many rowhouses have undergone multiple remodeling projects over decades. Previous owners may have removed walls, altered floor plans, installed additions, or finished basements. These modifications can obscure original structural conditions and make crack analysis more challenging.
A thorough evaluation often requires examining the entire context of the home rather than focusing solely on the visible crack itself.
Evaluating Crack Severity
Not every crack requires immediate intervention, but every crack deserves observation.
Hairline drywall cracks measuring less than one-sixteenth of an inch are often cosmetic. Monitoring these cracks over several months can help determine whether they remain stable.
Cracks wider than one-eighth of an inch generally warrant closer attention, particularly when accompanied by other signs of movement. Rapidly expanding cracks deserve prompt professional evaluation.
Photographing cracks periodically provides valuable documentation. Homeowners can compare images over time to identify changes in length, width, or pattern development.
It is also helpful to note seasonal trends. Some cracks may appear more prominent during certain times of year due to normal moisture fluctuations. Structural cracks, however, typically continue progressing regardless of season.
The Role of Moisture in Structural Movement
Water is one of the most significant contributors to foundation-related issues in rowhouses.
Poor drainage can saturate soils surrounding a foundation, reducing load-bearing capacity and encouraging settlement. Overflowing gutters, improperly directed downspouts, grading problems, and plumbing leaks can all introduce excessive moisture into the surrounding soil.
Basements often provide important clues. Efflorescence, damp walls, standing water, mold growth, and musty odors may indicate moisture conditions affecting foundation performance.
Addressing water management problems early can help minimize future structural movement and preserve the integrity of the building.
Proper drainage solutions frequently provide substantial long-term benefits, even when foundation repairs are not immediately necessary.
Repairing Drywall Cracks Versus Addressing Settlement
The correct repair strategy depends entirely on identifying the root cause.
When cracks stem from normal drywall movement, repairs typically involve removing loose material, applying joint compound, reinforcing affected areas with tape, sanding, priming, and repainting. Skilled finishing techniques can restore a seamless appearance.
Settlement-related cracks require a different approach. Cosmetic patching alone rarely provides a lasting solution if the structure continues moving. The underlying settlement issue must be addressed before interior repairs can be considered permanent.
Depending on the situation, corrective measures may involve foundation stabilization, drainage improvements, structural reinforcement, masonry repairs, or other engineering solutions. Once structural concerns are resolved, interior finishes can then be restored with greater confidence.
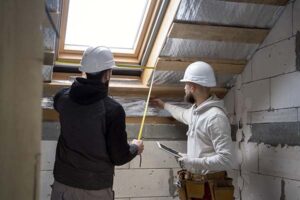
When Should You Call a Professional?
Homeowners often struggle with deciding when a crack deserves professional attention. Waiting too long can allow problems to worsen, yet unnecessary concern over harmless cosmetic cracks can create stress.
Professional evaluation is advisable when:
- Cracks continue expanding
- Multiple cracks appear throughout the home
- Doors and windows begin sticking
- Floors become uneven
- Exterior masonry develops visible cracking
- Water intrusion accompanies structural symptoms
- Previous repairs repeatedly fail
An experienced renovation professional, structural engineer, or foundation specialist can determine whether movement is cosmetic, moderate, or potentially significant.
Early identification often leads to more manageable repair solutions and helps prevent secondary damage to finishes, flooring, trim, and building systems.
Protecting the Long-Term Health of Your Rowhouse
Cracks in rowhouse walls are not always cause for alarm, but they should never be ignored. Some represent normal drywall aging and seasonal movement. Others serve as early indicators of foundation settlement or broader structural concerns.
The key lies in understanding the difference. Cosmetic drywall cracks tend to remain stable, narrow, and isolated. Settlement-related cracks often appear in recognizable patterns, grow over time, and coincide with additional signs of structural movement.
Careful observation, routine maintenance, moisture management, and timely professional evaluation all contribute to preserving the integrity of a rowhouse. By identifying the true source of wall cracking, homeowners can make informed decisions, protect property value, and maintain confidence in the safety and stability of their home for years to come.
Learn more about how to get started: