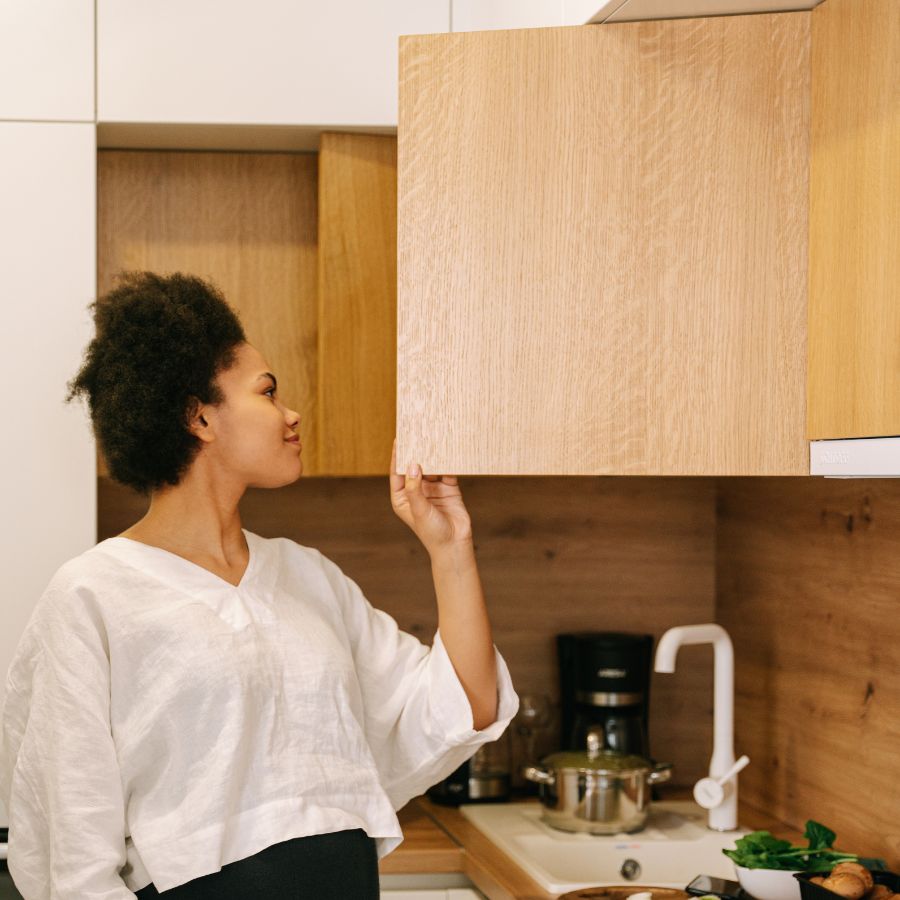
Damaged cabinets are more than a cosmetic frustration. They signal wear, moisture exposure, structural stress, or installation issues that can quietly affect how a kitchen, bathroom, or commercial space functions day to day. At Exquisitely Renovated LLC, we encounter cabinet damage in homes and businesses across Maryland and Washington D.C., often long before a client realizes the full scope of the problem. Understanding how cabinet damage happens, what it means for the space, and how to address it correctly can save time, expense, and unnecessary disruption later.
Within the first stages of evaluating damaged cabinets, our team often performs careful cabinet repair assessments as part of broader renovation consultations. This allows us to determine whether targeted repairs will restore integrity or if a more thoughtful replacement plan will better serve the space over the long term. This blog explores damaged cabinets from a professional standpoint, grounded in real-world renovation experience, craftsmanship standards, and practical decision-making.
Understanding What Cabinet Damage Really Means
Cabinet damage is rarely a single-issue problem. It often reflects a combination of environmental exposure, material limitations, and daily use patterns. Cabinets are among the hardest working elements in a home or commercial interior. They support weight, endure repeated movement, and face constant exposure to humidity, heat, and cleaning products.
Damage can present subtly at first. A door that no longer aligns, a drawer that resists closing, or a finish that appears dull or uneven may seem minor. Over time, these symptoms often progress into structural concerns that compromise usability and appearance. From a renovation perspective, early recognition makes a measurable difference in outcomes.
Different materials respond to stress in different ways. Solid wood cabinets may show cracks or joint separation. Engineered wood products may swell or delaminate. Thermofoil and laminate finishes can peel or bubble. Recognizing the material involved helps determine whether restoration is realistic or replacement is the wiser route.
Common Causes of Damaged Cabinets
Moisture and Humidity Exposure
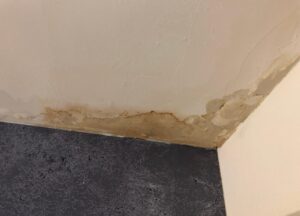
Moisture remains the leading cause of cabinet damage, especially in kitchens, bathrooms, and laundry areas. Steam from cooking, plumbing leaks, appliance failures, and poor ventilation all contribute to swelling, warping, and finish breakdown. Even small leaks beneath sinks can cause cabinet bases to deteriorate quietly until the damage becomes visible.
Humidity fluctuations also play a role. Wood expands and contracts with changes in moisture levels. Over time, this movement can loosen joints, crack finishes, and distort door alignment. In older homes, inadequate ventilation compounds the issue, accelerating wear on cabinetry.
Poor Installation or Structural Support
Cabinets rely on precise installation to perform correctly. When cabinets are not properly anchored, leveled, or supported, stress points develop. Doors may sag, drawers may bind, and frames may twist. These issues often appear months or years after installation, making the original cause less obvious to the homeowner.
Improper spacing and insufficient support for heavy loads also contribute to damage. Upper cabinets carrying oversized dishware or commercial-grade storage can pull away from walls if not reinforced correctly. Over time, this compromises both safety and aesthetics.
Material Quality and Age
Not all cabinets are built to the same standard. Lower-quality materials may look acceptable at installation but degrade quickly under normal use. Thin veneers, low-density particleboard, and inferior finishes struggle to withstand moisture and daily wear.
Age alone does not doom cabinets, yet older cabinetry often lacks modern protective finishes and construction methods. When paired with decades of use, even well-built cabinets may reach a point where repairs become less effective.
Signs That Cabinet Damage Requires Attention
Recognizing early warning signs helps prevent small issues from escalating. Cabinets that feel soft at the base, emit a musty odor, or show discoloration often indicate moisture intrusion. Doors that rub, tilt, or refuse to stay closed point toward structural movement or hinge fatigue.
Finish damage also warrants attention. Peeling, bubbling, or flaking surfaces suggest adhesion failure, frequently linked to moisture or heat exposure. Ignoring these signs allows damage to spread beneath the surface, where repairs become more complex and costly.
In commercial spaces, damaged cabinets may also affect compliance and safety standards. Loose hardware, exposed substrates, and compromised storage can interfere with daily operations and inspections.
Repair Versus Replacement, Making the Right Call
One of the most common questions clients ask involves choosing between repairing damaged cabinets or replacing them entirely. The answer depends on several factors, including material condition, extent of damage, layout goals, and long-term plans for the space.
Repairs make sense when cabinet boxes remain structurally sound and damage is localized. Door replacement, hinge adjustment, refinishing, or base repairs can extend the life of quality cabinetry when performed correctly. Skilled craftsmanship ensures that repairs blend seamlessly and restore proper function.
Replacement becomes the smarter option when damage affects core structural elements or when moisture has compromised multiple cabinet sections. Swollen cabinet boxes, widespread delamination, and mold presence typically indicate deeper issues that repairs cannot reliably solve. Replacement also allows homeowners and business owners to improve layout efficiency, storage capacity, and visual cohesion.
The Hidden Risks of Ignoring Damaged Cabinets
Delaying action on damaged cabinets carries risks beyond appearance. Moisture-damaged cabinetry can harbor mold and mildew, affecting indoor air quality. Structural instability may lead to falling shelves or doors, posing safety concerns.
Damaged cabinets also impact surrounding materials. Moisture can spread to flooring, walls, and countertops, multiplying repair costs. In kitchens, compromised cabinets may affect appliance performance or plumbing access, increasing the likelihood of further damage.
From a property value standpoint, visible cabinet damage detracts from perceived care and maintenance. Buyers and tenants notice these details quickly, often interpreting them as indicators of broader neglect.
Professional Assessment Makes the Difference
Accurate evaluation of cabinet damage requires experience and trained observation. Surface-level issues often mask deeper problems within cabinet boxes, wall attachments, or subflooring. A professional assessment identifies not only what is visible but also what lies beneath.
At Exquisitely Renovated LLC, assessments consider structural integrity, moisture history, material composition, and future use of the space. This comprehensive evaluation supports informed decisions that align with both immediate needs and long-term goals.
Professional insight also helps prioritize repairs. Addressing underlying causes, including ventilation improvements or plumbing corrections, prevents repeat damage and protects the investment.
Preventing Future Cabinet Damage
Prevention begins with thoughtful design and proper installation. Selecting materials suited to the environment, incorporating adequate ventilation, and ensuring precise installation all contribute to cabinet longevity. Protective finishes and moisture-resistant materials perform especially well in kitchens and bathrooms.
Routine maintenance plays an important role as well. Promptly addressing leaks, maintaining caulking, and using appropriate cleaning products preserve finishes and structural components. Simple habits, including wiping spills quickly and avoiding excessive moisture exposure, make a noticeable difference over time.
In commercial settings, regular inspections help identify wear early. High-use environments benefit from durable materials and proactive maintenance schedules that minimize downtime and repair costs.
When Cabinet Damage Signals a Larger Renovation Opportunity
Sometimes damaged cabinets serve as the catalyst for broader improvements. Outdated layouts, inefficient storage, and worn finishes often accompany cabinet deterioration. Addressing cabinets within a larger renovation allows for cohesive upgrades that improve flow, functionality, and visual appeal.
Kitchen and bathroom renovations offer opportunities to reconfigure storage, enhance lighting, and update finishes while resolving underlying damage. Commercial renovations may focus on durability, code compliance, and brand alignment, all while improving daily operations.
Approaching cabinet damage with a long-term vision ensures that solutions add value rather than merely addressing symptoms.
A Thoughtful Approach to Cabinet Restoration
Damaged cabinets deserve careful attention, not quick fixes. Each situation carries unique factors that influence the best course of action. Professional evaluation, quality materials, and skilled workmanship determine whether cabinets regain their integrity and beauty or continue to decline.
From subtle repairs to full replacements, addressing cabinet damage thoughtfully protects the surrounding space and enhances daily use. With the right expertise guiding the process, damaged cabinets become an opportunity to restore confidence in the space and ensure it performs as beautifully as it looks for years to come.
Learn more about how to get started: